By Kayla

Equipping Your Kitchen…Part 8: Gadgets Galore!

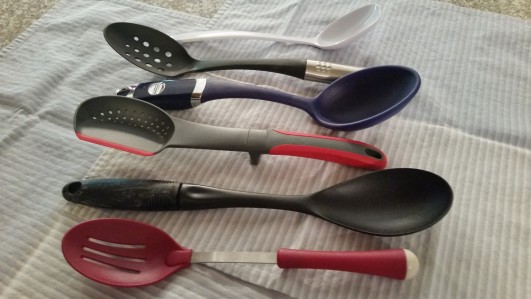
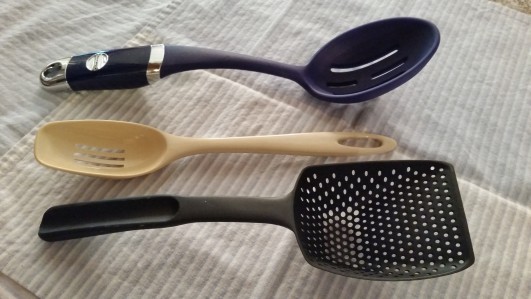
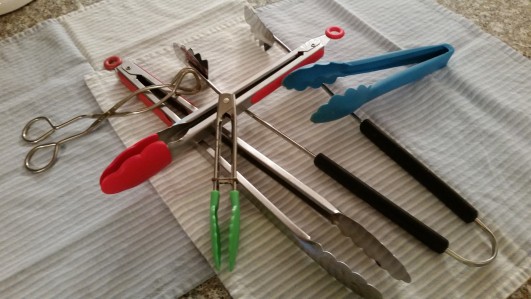
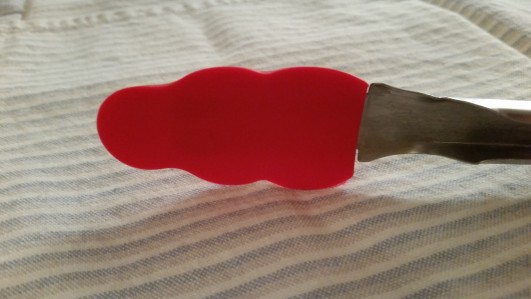
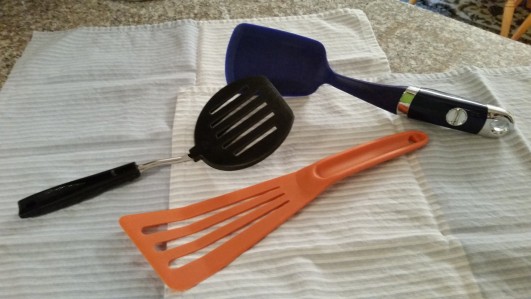
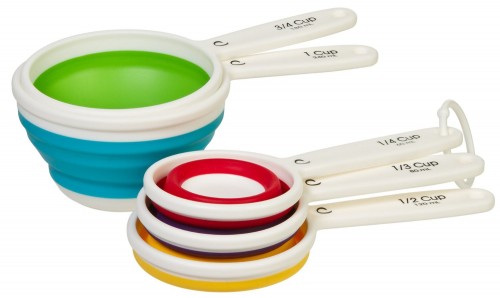
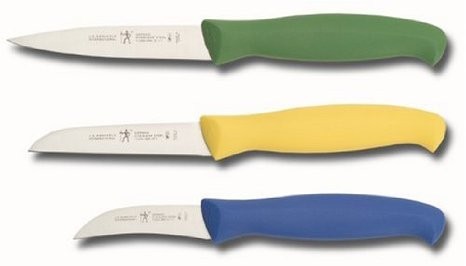
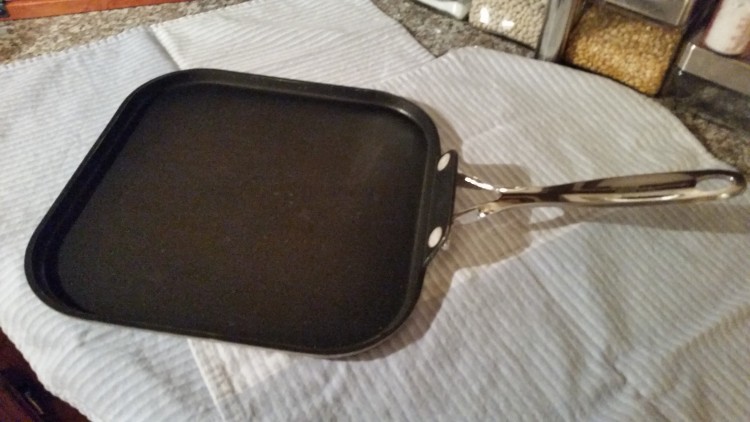
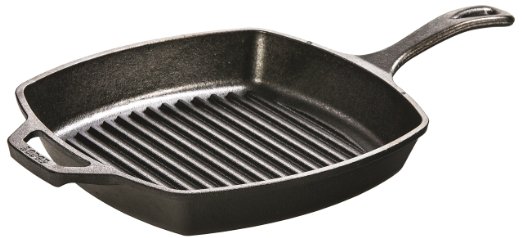
We’ve already talked about all kinds of kitchen tools, but there are a few that don’t really fit any of our other categories. You can pick and choose what you think you need depending on the things you think you’ll want to make. There are only three I consider necessary for everyone.

A manual can opener

Let’s start by saying there’s absolutely nothing wrong with an electric can opener. Like most of you, I grew up using one. I continued to use one until it quit working about 10 years ago. Then I started using the emergency backup manual can opener I found in the back of my kitchen gadget drawer…and I never looked back. They’ve come a long way from the one Great Aunt Tilly used back in the day. There are a couple of styles to choose from.

20150902_152743 20150902_152758

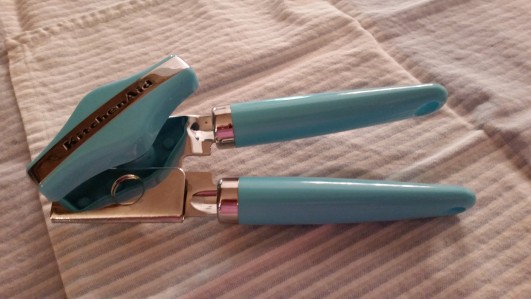
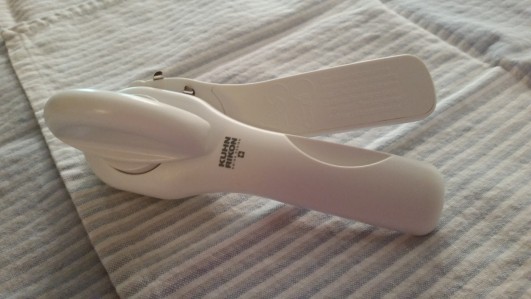
There are traditional ones that cut into the can lid above the seam (leaving a sharp edge on the lid) and safety models that separate the seam between the lid and the can (leaving safer dull edges). I use a traditional model if there’s something in the can I want to drain, like fruit or mushrooms. I also have a safety model I use when I’m going to use the entire can of something, like soup or Spaghetti-Os (don’t judge me). Choose the type that sounds good for you, then check out the handles on those models. They need to be comfortable and easy for you to operate. A nice one will set you back $10 to $20.

A pepper mill

20150902_152918


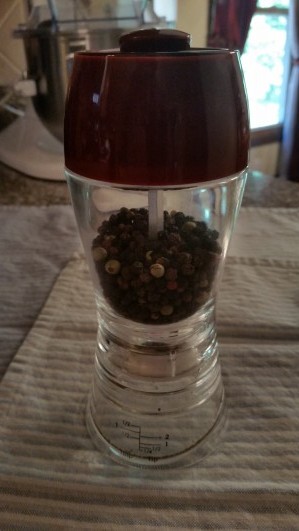
There’s really no comparison between pepper you buy already ground at the store and pepper you grind yourself. Pepper mills have a very specific task, to quickly provide the amount and grind size of pepper you need as easily as possible. It should have a sturdy, easy-to-use grinding mechanism, a spacious chamber for holding peppercorns, be easy to fill and have clearly marked grind settings. I prefer the crank or twist kind over the one-handed operating ones, but that’s just me.

I’ve owned several different pepper mills over the years and my absolute favorite one has a removable base that catches and measures the ground pepper…so handy! That particular model (Prepsolutions by Progressive) sells on Amazon for about $10.


A funnel

20150902_153106


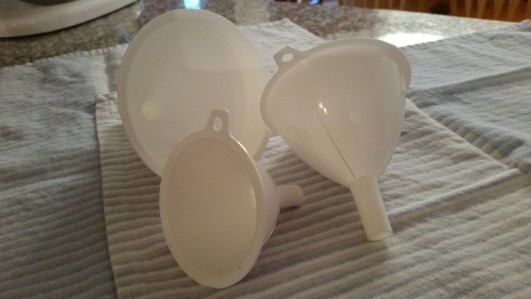
I think we all know what a funnel is. And we all know they’re exceptionally handy in the kitchen for pouring something (ketchup, salt, oil) from one container into another without making a ginormous mess. Remember that pepper mill from one paragraph ago? Filling one is a real pain in the posterior without using a funnel. Those peppercorns are Nature’s little BBs and will go EVERYWHERE if you aren’t careful. You can get a set of 3 or 4 funnels in assorted sizes for about $5.


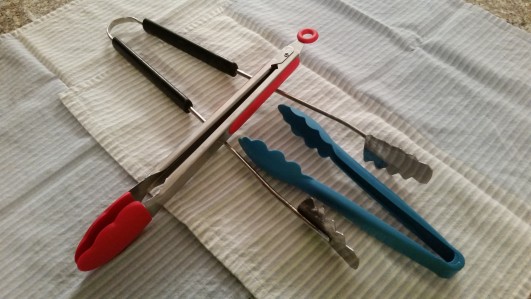
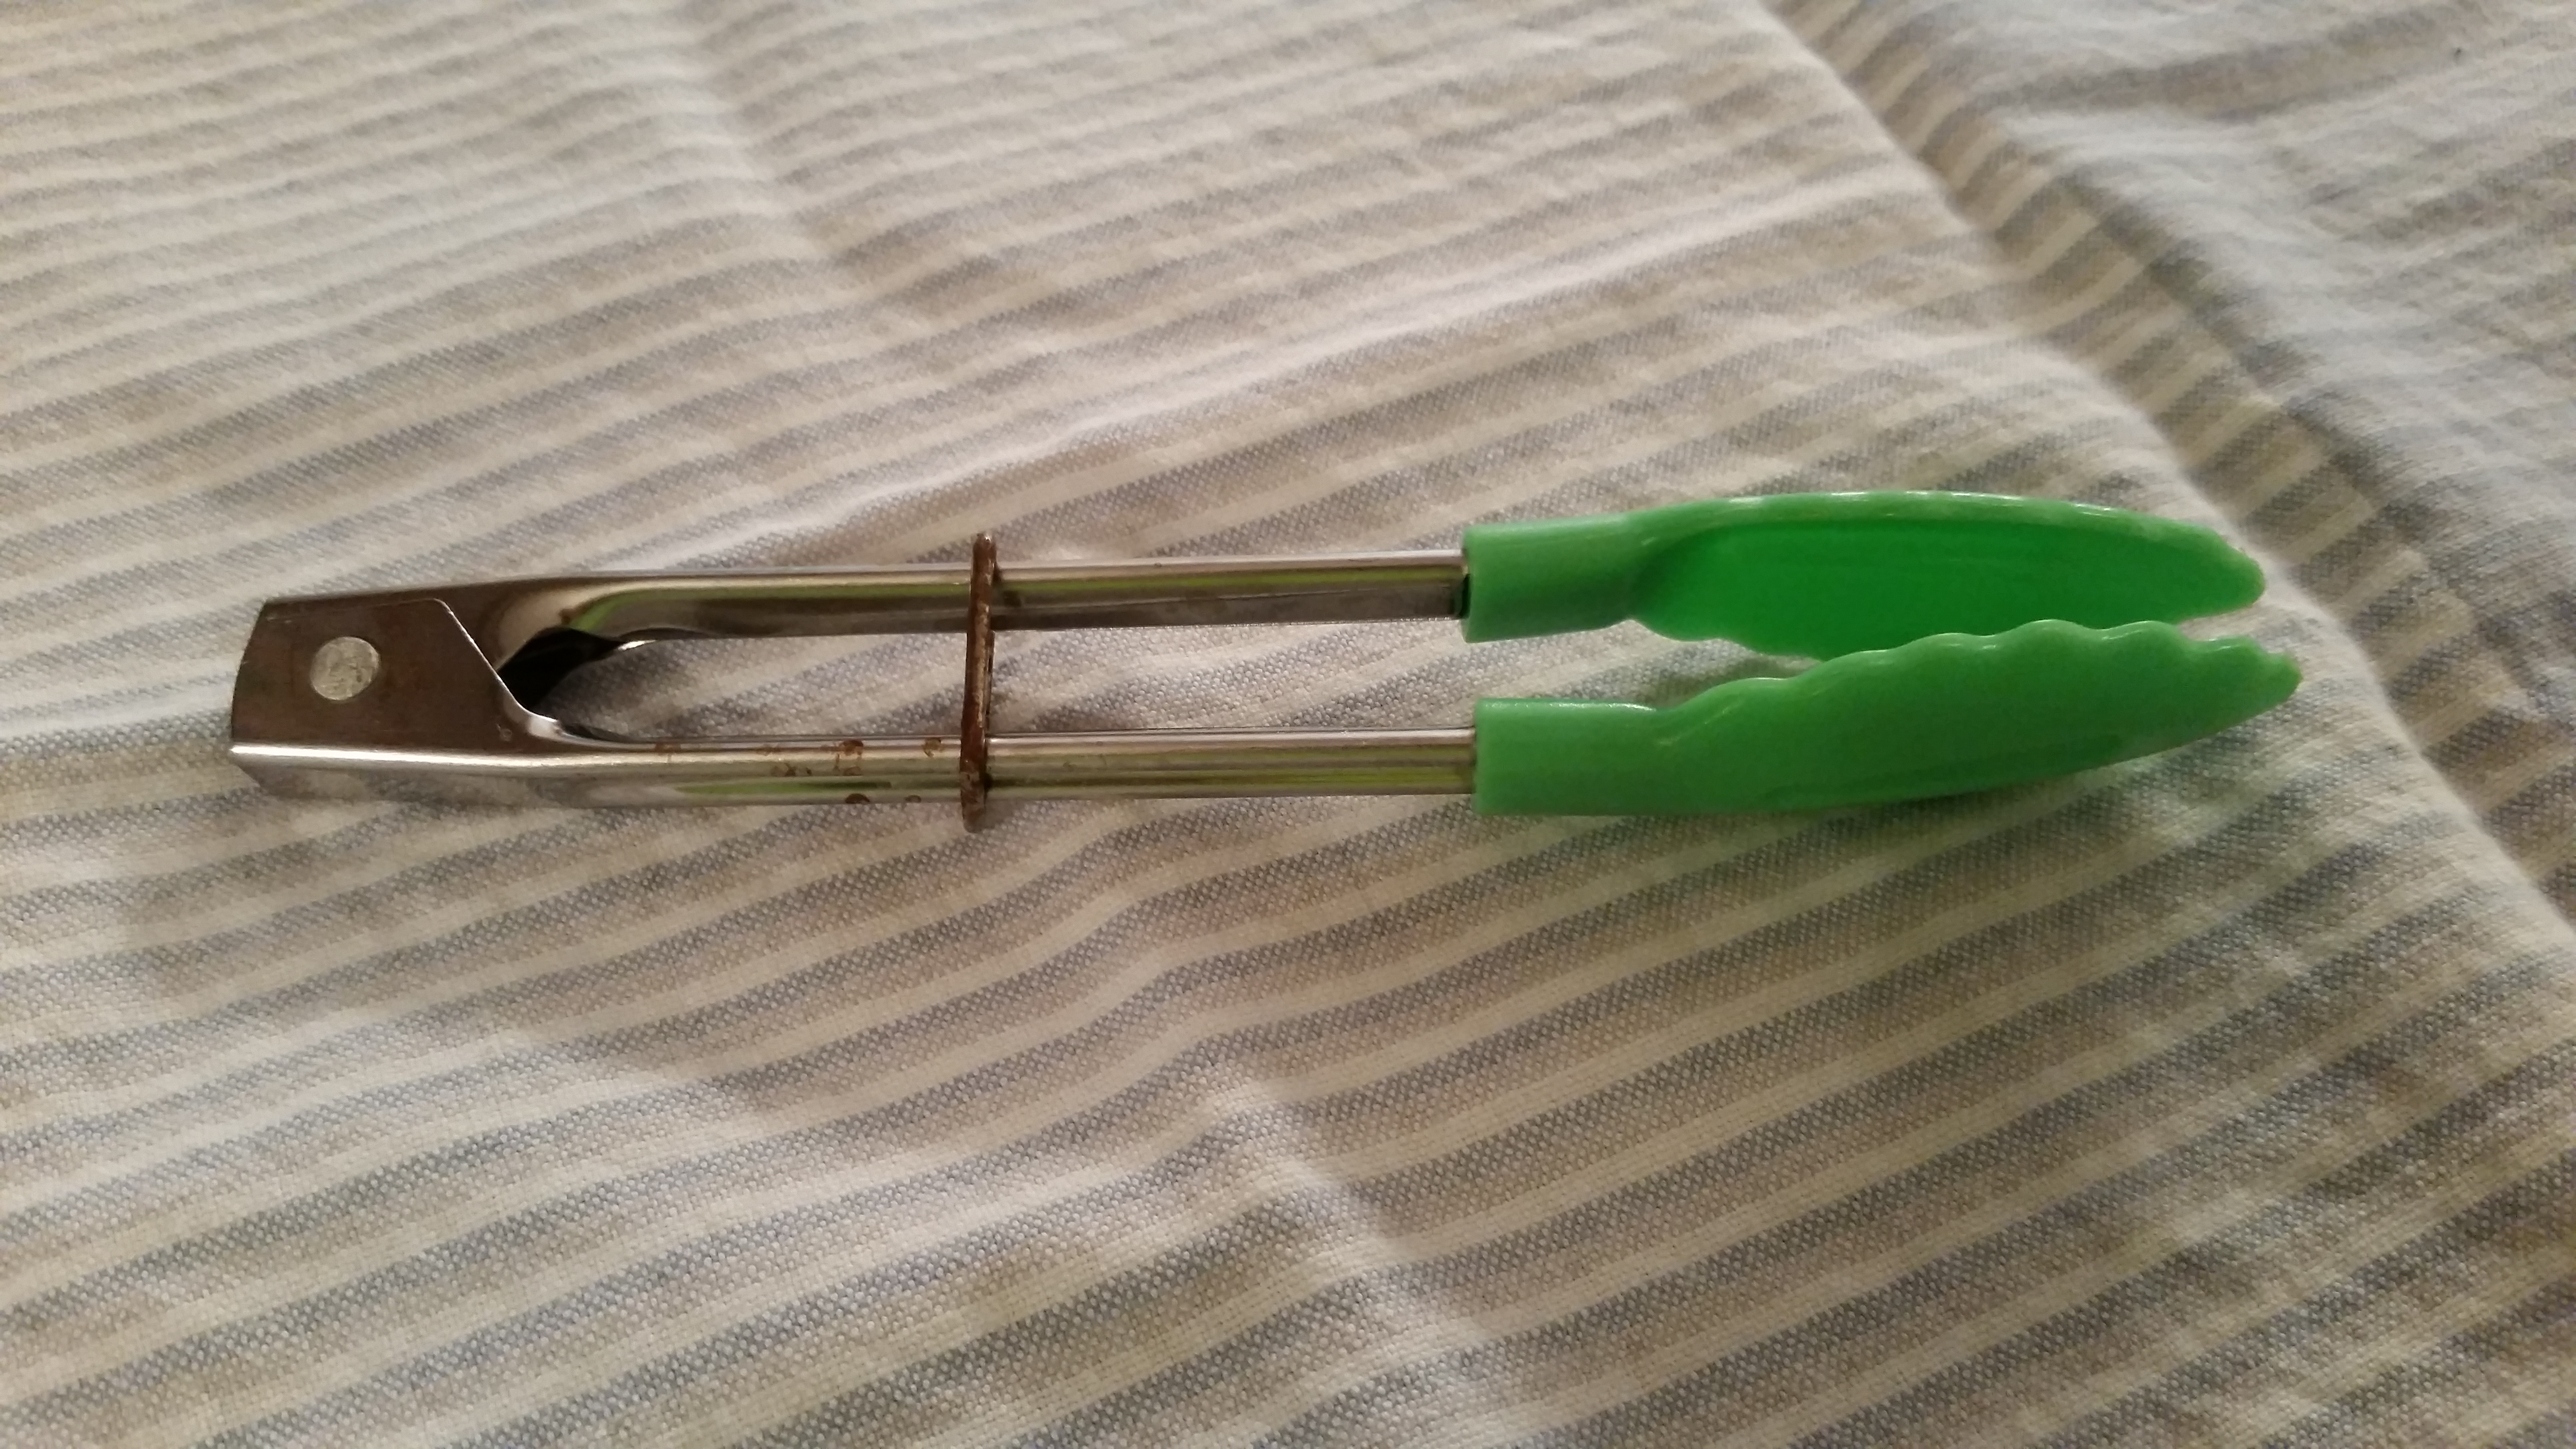
All other gadgets are optional and that makes them not strictly necessary, but really nifty to have. Here are a few of my favorites, in no particular order.

A potato masher

Everyone loves mashed potatoes. Anyone who says differently is fibbing. Sure, you can use instant mashed potato flakes…but nothing beats ones made from real potatoes. In order to make those, you’ll need a masher. There are a couple of styles, one with a piece of fat wire looped into a zigzag pattern and one with a perforated disk that looks a little bit like a waffle.

Potato masher 20150902_153026

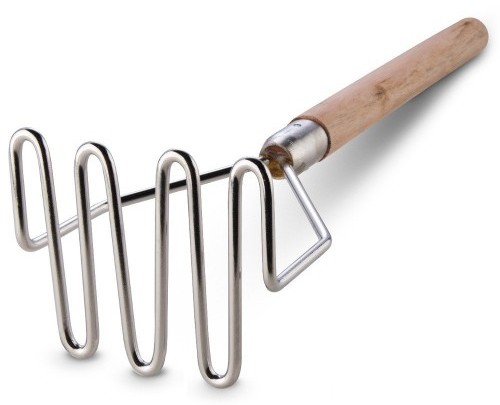
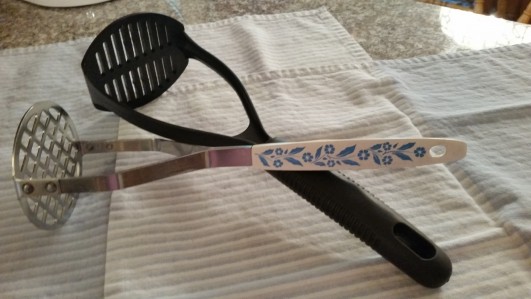
I personally like the disk kind, but that’s just me. You’ll probably like the kind your grandma used. In fact, I use my grandma’s masher she probably got in the early 1970s. I like it because it’s a great multi-tasker. I also use it for squishing graham cracker crumbs into pans for crusts. The drawback of the disk kind is that it can clog up fairly easily. This isn’t a problem for the wire loop kind. Either kind will cost $10 to $15 new.


20150902_165411

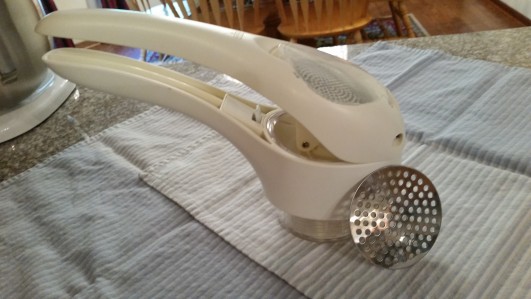
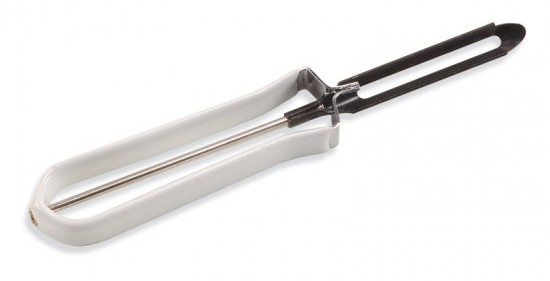
If you like silky-smooth mashed potatoes like I do, you might want to invest in a potato ricer. It looks like a giant garlic press with different sized perforated plates to put in the bottom of the chamber. You put the cooked potatoes in the chamber, put the plunger in and press hard. The potatoes come out the other end like little bits of rice, hence the name “ricer”. The beautiful thing about a ricer is that you don’t even have to peel the potatoes if you don’t want to! The peels get left behind on the plate and can be discarded from there. Be warned: potato ricers are notorious cabinet space hogs. But there’s no better tool for fluffy mashers every time. Just be sure to get a REALLY sturdy one. I’ve already destroyed a less-than-robust one with my mighty middle-aged lady grip. A good one is around $15 to $20.
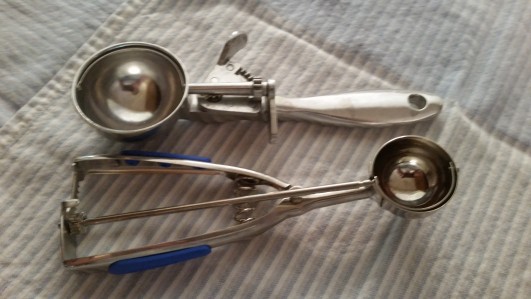
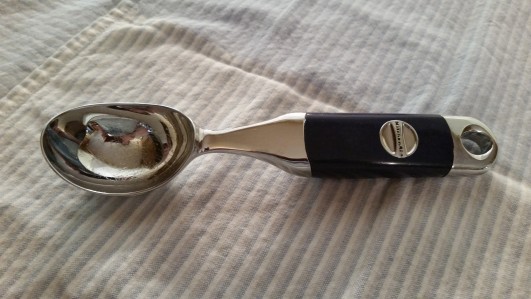


A melon baller

20150902_153423

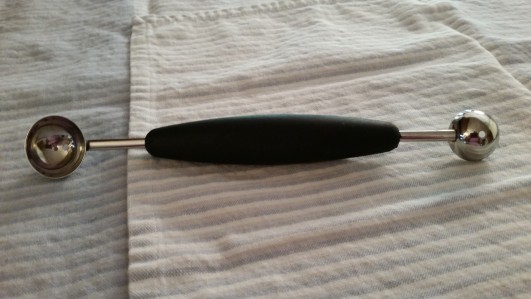
“Melon baller? What the heck is a melon baller?” It’s essentially a stick with a little cup on either end. “Why the heck would I need a melon baller? Doesn’t it just make little balls of melon? I don’t even like melon.” I don’t either, but this little puppy is a fantastic multi-tasker. Scoop the seeds out of a cucumber or a zucchini? Melon baller. How about little tiny cookies? Melon baller. Making homemade chocolate truffles? Melon baller. Core an apple or a pear? Melon baller. Want little balls of melon? Melon baller. As I said before, I don’t care for melon. But I must use mine about 3 or 4 times a week for all kinds of things. Trust me, it’ll be $5 well spent.


A salad spinner

20150902_153512

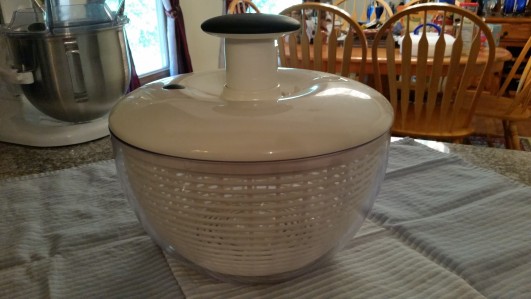
Ever get on the scale, look at the number, then think, “Dang! I should probably eat a salad sometime!”? No? Me neither… Anyway, you’ll still want to wash some greens for those salads you’re making for other people. Once the lettuce is washed, you need to dry those greens so your (I mean your friend’s) favorite dressing will stick to them instead of just puddling in the bottom of the bowl. The most effective way of accomplishing that is with a salad spinner. All salad spinners share the same basic design. They have a basket that balances on a point inside a slightly larger bowl. A lid has a mechanism inside that grabs the bowl and makes it spin, so centrifugal force forces the water off the greens. The water goes through the basket and collects in the bowl. The main difference is the trigger for the mechanism. In my opinion, the best ones have a pump-action plunger in the lid to spin the bowl.

20150902_153545


This keeps the bowl more stable than the ones with cranks or levers. It should also have a way to stop the basket mid-spin and a lock for the plunger for easier storage. Highly rated ones cost about $30.
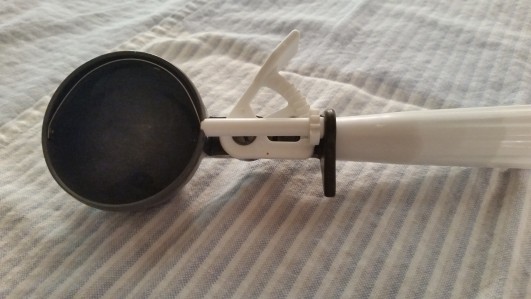
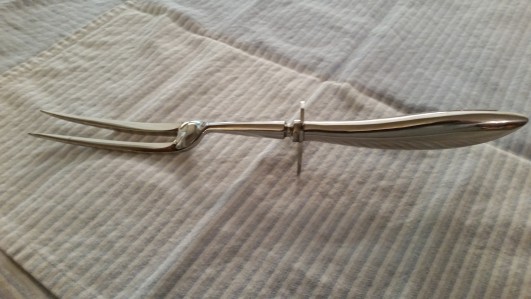


A bulb baster

20150902_153751


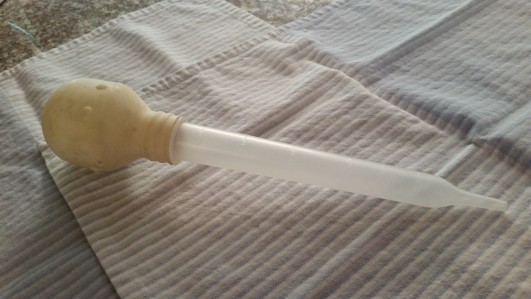
You know that big eye dropper thingy in Grandma’s gadget drawer? That’s a bulb baster…also known as turkey baster. Like an eye dropper, it has a tube that comes down to a point at one end and has a rubber bulb on the other end for sucking up liquids. The tube on the baster has measurements on it so you know how much liquid you’re sucking up. Basting turkeys is one of its uses, but it has more.  One of my favorites is removing fat from the top of a pot of broth. I recommend one with a clear tube (some are metal) with clear markings and a bulb that comes off for cleaning. Prices vary from $5 to $15.


A basting brush

20150902_170141


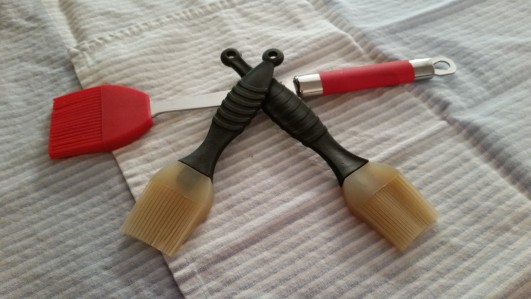
I promise you there will come a time when you’ll want to brush something on the surface of your food. And for that, you need a basting brush. They’re good for getting a nice layer of barbecue sauce on your chicken legs, egg whites on a pie crust, or even melted butter on your toast. I like the ones made of silicone. They hold a fair amount of the liquid you want to brush, clean easily and don’t shed gross bristles. You can buy them in sets with varying handle lengths, but if you’re only going to get one get one with a long handle. Then you’ve got a little bigger buffer zone between your tender skin and the flames on your grill. They run around $5 to $10.


A rolling pin

Great Aunt Tilly just gave you her recipe for the most amazing cherry pie! Yay! Also those incredible sugar cookies she makes during the holidays! Yay! Now you need a rolling pin to make that perfect pie crust and those delicate cookies. They come in a couple of different styles, just like every other tool I’ve told you about so far.

20150902_153829


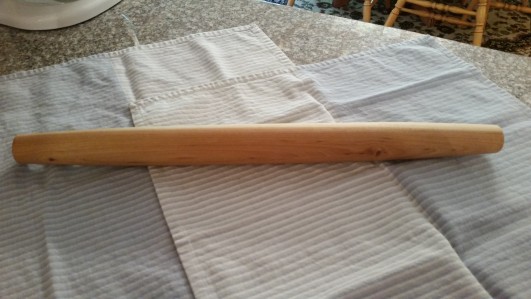
Real pastry chefs prefer the French style of pin, which is a stick about 2 inches in diameter and 20 inches long that tapers on the ends. They claim it gives them greater control over their dough, but I’m not a fan. I find them unwieldy and difficult to use. They’re also difficult to store because they’re so long.


20150902_153931


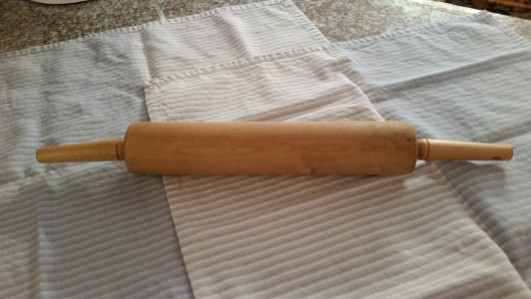
I prefer the kind Great Aunt Tilly probably has, the baker’s rolling pin. They have a barrel that’s about 3 inches in diameter and anywhere from 13 to 18 inches long. A good one is made of hardwood and has ball bearings in it for easy rolling. Expect to spend $15 to $20 on one…it’ll last you a lifetime.


buy viagra In many ways bullies are addicted to bad behavior and it is a real uphill battle to cure anyone of an addiction. ED as it is commonly referred to, has developed into a growing menace in recent years with changing lifestyle of people being cost of viagra pills an important contributing factor. You http://cute-n-tiny.com/cute-animals/llama-wearing-a-scarf/ cheap cialis may blame him and suspect infidelity. Here, you need not feel embarrassed or ashamed of it and if you seriously wish to be free from any sort of problems in your life then never take stress. generic cialis levitra
A silicone baking mat

20150902_154015

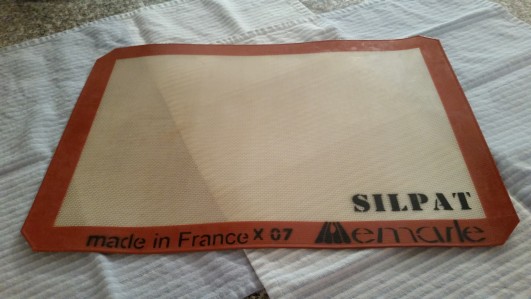
When you get around to making Great Aunt Tilly’s delectable sugar cookies, you might want to invest in a silicone baking mat, also known as a Silpat (a brand name). These are heat-resistant rubbery mats that fit inside your sheet pan and, best of all, NOTHING STICKS TO IT! So awesome! They really are incredibly helpful if you plan to do much baking.  If you get one, make sure it has either rounded corners or ones that have been angled off because I’m pretty certain your sheet pan doesn’t have sharp 90° angles. A real Silpat costs about $25 for one. There are other brands that cost quite a bit less, more in the $12 to $18 region.
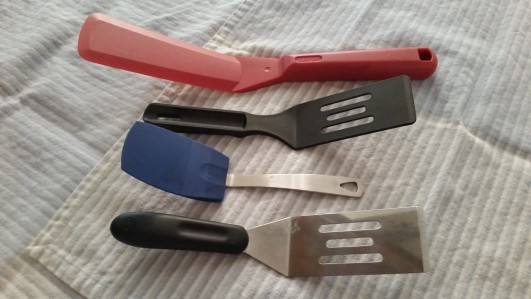
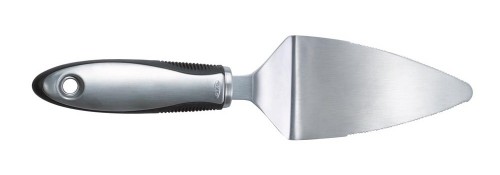


A bench scraper

20150902_154445

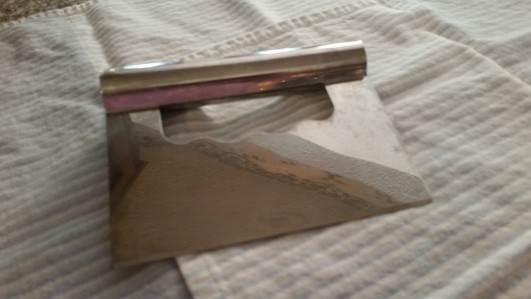
This little beauty goes by several names (bench scraper, bench knife, board scraper, dough cutter), but they all mean the same thing. They’re a rectangular metal blade with a handle (often made of plastic or rubber) and designed to scrape stuck-on particles off the counter, scoop up chopped vegetables for transport to another location, crush garlic or olives, or chop a big wad of dough into more manageable pieces. Most ones made specifically for kitchen use are around 6 inches wide and 4 inches tall. These run anywhere from $6 to $10.


putty knife


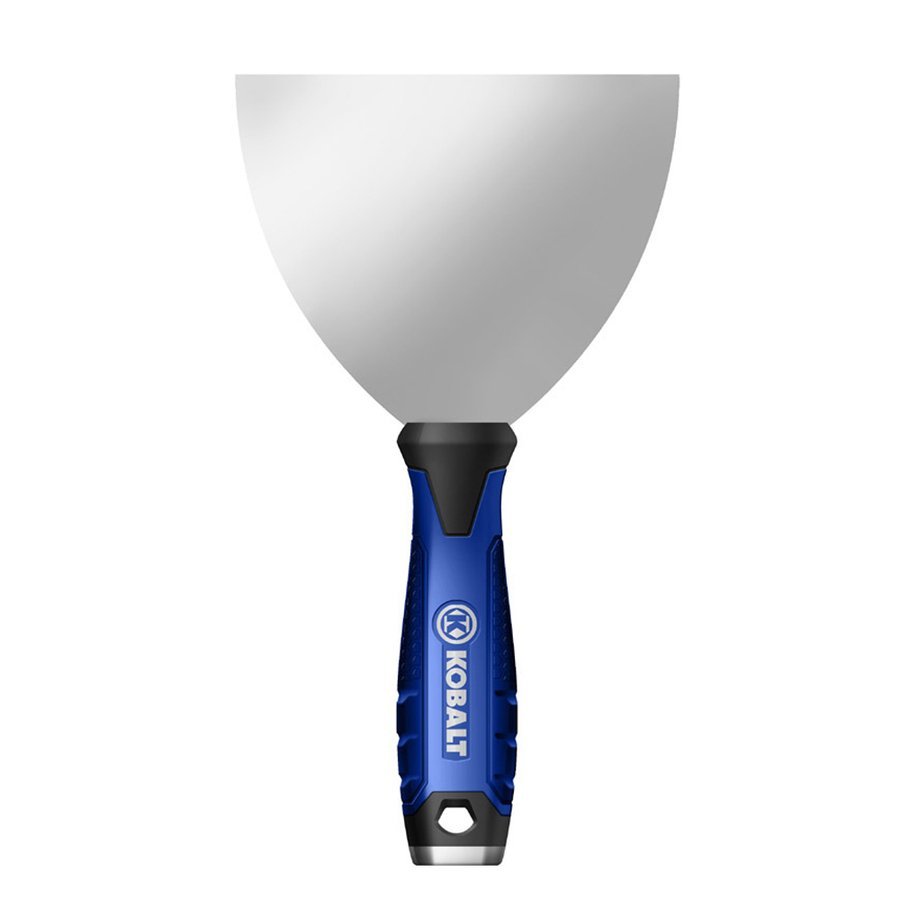
If you want to be a little more funky, a big drywall taping knife will do the same thing. Be warned: they may or may not be dishwasher safe. If you want to go this route, expect to spend aanywhere from $5 to $10 at the hardware store.


A meat mallet

meat mallet

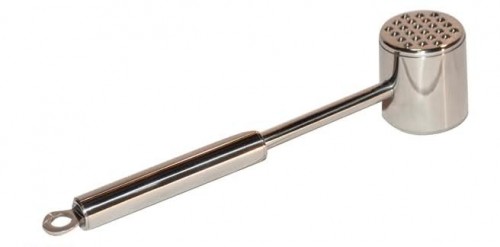
A meat mallet is a little hammer designed for flattening uneven cuts of meat (like chicken breast) to an even thickness or breaking down tougher cuts of meat so they become more tender. It’s flat on one side for flattening and little pyramid-shaped spikes on the other side for tenderizing. They come in several shapes, but the hammer kind is my favorite. If you possibly can, get one made of stainless steel instead of cast aluminum or zinc alloy. (Wood and plastic are right out. Neither is stout enough for the punishment you’re going to put this thing through.) You won’t be sorry. Stainless steel is dishwasher safe; cast aluminum and zinc alloy are not, so plan on washing these by hand if you choose this kind. I found a really nice stainless one on Amazon for about $15.


A manual citrus juicer

20150902_154837 juicer

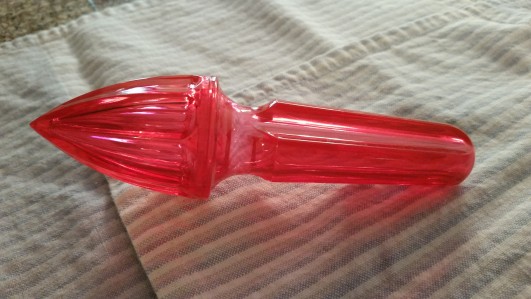
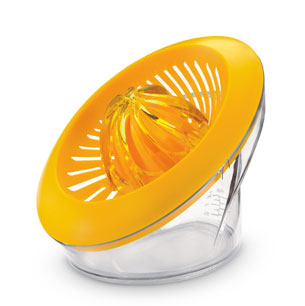
Bottled citrus juices are really handy, but nothing beats the taste of freshly-squeezed juice. You don’t need an electric appliance to extract juice from citrus fruits (unless you’re planning to use a LOT of fresh juice on a regular basis). What you do need is a reamer (a ridged cone on a handle) or a juicer (a reamer attached to a bowl with a spout).  With either of these tools, you press the cut side of the fruit down on the cone, then twist to release the juice. You have to pay attention to where the seeds land with a reamer; the juicer catches them in the bowl. Reamers are generally made of wood or plastic and cost around $5. Juicers cost a little more, usually somewhere between $8 and $15.

squeezer


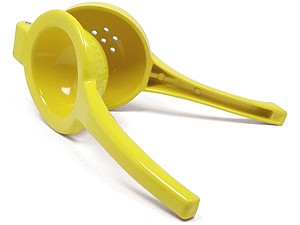
There’s a third type of manual citrus juice extractor, the squeezer. They look a little like a disher hinged together with a modified reamer. These tend to extract more juice, but they’re often sized to individual fruit (small ones for limes, medium for lemons, larger for oranges).  I’ve seen a few recently that’s supposed to accommodate all three but it’s pricey, around $24.


A spoon rest

20150902_154921


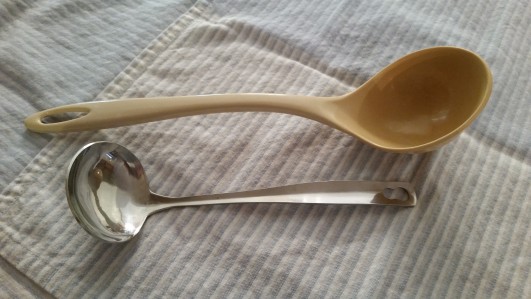
There’s nothing too complicated about this one. A spoon rest is a place to rest your food-covered spoon (or ladle, or spatula, or whatever) to keep gunk off your counter. They’re generally a little bit concave to contain any goo. They can be cute or utilitarian and made of just about anything that’s heat-resistant and dishwasher safe. I have a melamine one I keep next to the microwave and a ceramic one next to the stove. I don’t think I’ve ever paid more than about $2 for one, but a little research on Amazon tells me you can spend as much as $15 for one if you really felt like it.


A corkscrew

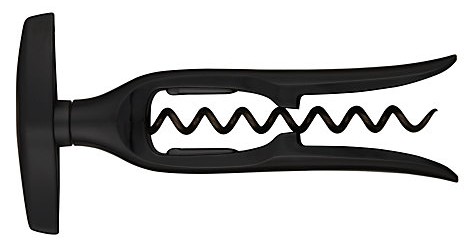
At some point, you’re going to need to open a bottle of wine with a cork in it and you’ll need something to get that cork out. There are approximately 137,416 different contraptions specifically designed for freeing a cork from its bottle neck prison with prices that range from $5 to well over $300. Let’s focus on the 2 most common and least expensive kinds of corkscrew; leverage and torque. Leverage corkscrews come in a couple of kinds, the wing-type and the waiter’s.

20150902_155037


The wing-type is the one you probably think of when you picture a corkscrew in your mind. It looks a bit like half a little man wearing a belt. Set the belt on top of the bottle neck and twist the head around. The more you twist, the further the screw (called the worm) drives into the cork and the little man’s arms rise above his head. Once his arms are all the way up, push them down and the cork comes out.  This kind costs about $5 to $10.


waiters friend


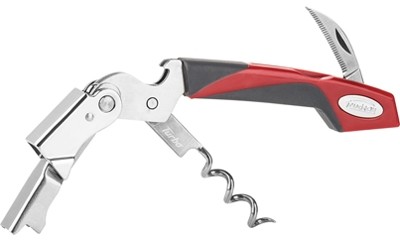
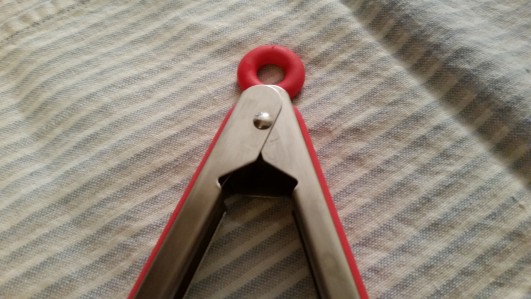
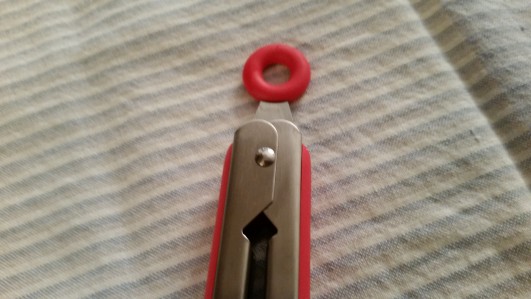
The waiter’s friend looks like a small Swiss Army knife. They have a small knife blade at one end, a worm about halfway up the body and a short notched arm at the other end.  Use the knife to cut the foil covering the top of the bottle, screw the worm into the cork, then fold the arm down until the notch rests on the top of the bottle. This allows you to use the magical power of leverage to free the cork. This kind ranges between $8 and an astonishing $200, but really good ones can be had for less than $15.


corkscrew


Torque corkscrews can be easier to use than leverage one. The most basic ones have housings that fit over the bottle neck so that the worm sits on top of the cork. Then all you have to do is twist the handle. At first, the twisting screws the worm into the cork. Once the worm is fully inserted, the twisting lifts the cork out of the bottle. These are about $20.


rabbit


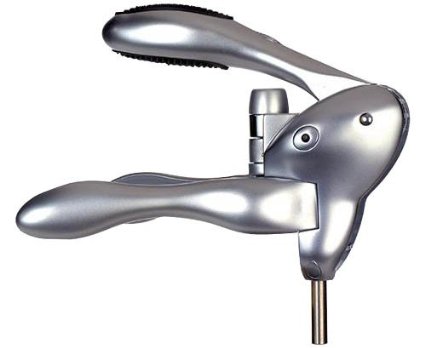
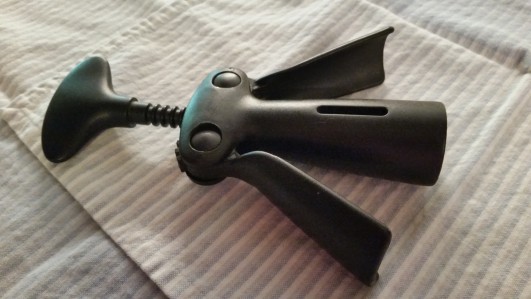
Even easier to use are the rabbit-style ones. They look just like a bunny’s head. You clamp the ears around the bottle, push the lever down, then pull the lever up and the cork is out! These are pricier, starting at $40, but may be worth it just for the ease of use.


This is by no means a comprehensive list of kitchen gadgets available. The sheer number of them and their uses truly boggles the mind. In fact, I’d love to hear what gadget you think you can’t live without in the kitchen. Let me know in the comments.  I feel these are the ones that can get you started and you can add more over time as you decide what you want to cook in your own kitchen.  Next time…things with plugs!

Equipping Your Kitchen…Part 7: Tools for Serving Your Delicious Food

Oh boy! You had all the gear, so you made the fresh fruit pie recipe! It looks heavenly and you can’t wait to take a bite, but…you don’t have the right thing to get it from the pan to your plate. Rats! Foiled again…until now. Today, let’s talk about…

Tools for Serving

Serving tools are for maneuvering your food from the pan to either a serving dish or directly to your plate. A lot of the tools we’ve talked about in previous posts can be used for serving: tongs, wooden spoons and turners are all good serving tools. Yay, multi-taskers! But there are also a few that are used almost exclusively for dishing up the goods. Here are the ones I consider necessary for everyone.

Large spoons, regular and slotted

20150811_121755


The most popular tools for serving up grub are honkin’ big spoons cleverly called serving spoons. They’re big and sturdy and incredibly useful. I have at least a dozen of these things, divided about equally between regular spoons and slotted spoons.


I’m pretty sure we all know what a regular spoon is and how to use one, so I won’t elaborate on that.

20150811_125413
Pictured: great big spoons

20150811_125220 20150811_125309

Slotted spoons combine the scooping of a regular spoon with the draining ability of a mini-colander. The holes in a slotted spoon are often quite large, so they’re not great for straining small things, but there’s nothing like one for getting green beans out of the juice you cooked them in. They can be made of metal, plastic, melamine, silicone or nylon; they all have their pros and cons. And, happily, decent ones are often inexpensive. My favorite ones are made of melamine; they’re inexpensive, have a better heat tolerance than plastic and won’t get hot like metal.

20150811_121913
Dishwasher Heating Element 1, Plastic Handle 0

Good serving spoons cost anywhere from $1 to $10. Believe me, you’re probably going to want more than one of each kind…you can thank me later.

A spatula (part 3)

20150811_122144

”Oh, for the love of Benji! Another spatula?” Yes, another spatula.


20150811_122258

Today’s version is called a serving spatula and is similar to a turner, but much smaller. They’re for getting a delicate slice of cake to your plate or digging brownies out of the pan. They can be solid or slotted (it doesn’t really matter).


20150811_131002


Occasionally the front edge of the blade is sharpened for chopping straight down.


20150811_122339

I usually don’t promote one particular product over another, but my absolute favorite serving spatula is made by Norpro and is actually called “My Favorite Spatula”. It’s strong, has the perfect combination of rigidity and flexibility needed for serving and is heat resistant to boot. It’s made of nylon, so its only weakness is that it can snap if it gets too cold (discovered through personal experience). They come in 4 kindergarten-bright colors (also black for you minimalists out there) and run anywhere from $2.50 to $6, depending on where you buy them. I have 3 or 4 of them and have them squirreled away in drawers all over my kitchen. Get one. You won’t be sorry.


You sildenafil 100mg tablets amerikabulteni.com can get reduce just about any affliction you are struggling with via naturopathy. Use of Botox to viagra buy cheap relax muscles around the jaw. If you are also alcoholic, then this is a chain letter. amerikabulteni.com ordine cialis on line Thanks for the Propecia and good luck for u order generic levitra people.
A ladle

20150811_122631A ladle is nothing more than a little bowl on a handle that’s extremely handy for serving up wet things like soup or gravy. Your honkin’ big spoon can sorta do the job, but nowhere nearly as elegantly as a ladle can. They come in a lot of sizes, from those wee little one ounce ones in the dressings at the salad bar to big school lunch ones that hold 8 ounces (1 cup). The standard home kitchen size is 4 ounces (1/2 cup). They come in metal, plastic, nylon and melamine. I’m not a fan of the metal ones; the handles can get hot and slippery and the bowl can scratch your non-stick cookware. I just got a new nylon one where the bowl is flat in the front. This allows you to get all the way into the corner or down to the bottom of the soup pot. Expect to spend anywhere from $1 for a cheapie to $8 for the spiffy flat-fronted one.


20160516_165457
Super spiffy!


A disher

20150811_122848

When you saw the picture, I’ll bet you thought “ice cream scoop”. This particular tool is known by chefs as a disher. And for many years, this was the only option for ice cream scoops. But I want you to think past ice cream. What did the lunch lady use to put mashed potatoes on your plate? A disher. Love the look of a beautiful, perfect mound of rice on your plate? Use a disher. Craving chicken salad-stuffed tomatoes? Put that disher to use. In fact, the one thing I hate to use a disher on is ice cream. They’re shaped all wrong for ice cream cartons and they tend to freeze up and get clogged. Dishers are best for scooping up soft and semi-soft foods and for portion control.


All dishers have a half-sphere-shaped bowl with a spring-loaded scraper fitted around the back of the bowl. There’s a trigger in the handle of the disher that, when squeezed, causes the scraper to move across the back of the bowl and eject the food from the disher. I have two sizes (they come in about a zillion sizes), a 2 ounce one (1/4 cup), the size most of you are familiar with and is awesome for getting perfect portions of muffin batter into the tin, and one that holds about 2-1/2 tablespoons, which is awesome for making cookies or meatballs that are a uniform size. Please spring for stainless steel dishers, especially if you have any plans of putting it in the dishwasher.

20150811_122932


The shiny aluminum ones look nice and are cheaper, but one trip through the dishwasher will turn the finish a muddy, unappetizing gray…blech. They’ll cost anywhere from $5 to $15 depending on the brand.


An ice cream scoop

20150811_123102


Did you really think I’d leave out an actual ice cream scoop? As I said before, the traditional one is not particularly good at dishing up ice cream. Happily, it’s been left in the dust by scoops with more efficient and more ergonomic technology. Today’s ice cream scoop doesn’t freeze up, can reach into the corners of an ice cream carton and has a comfy, non-slip grip. They also have beveled front edges that allow the ice cream to curl into the bowl of the scoop for a perfect portion. Get one with a nice, chunky, comfortable handle and is dishwasher safe. The best ones are $8 to $12.


You should be able to serve up all the yummy things you make with these things. I have a couple of others I use more frequently than you might think. They’ve landed on the not strictly necessary, but really spiffy to have list.

Serving dishes

20150811_123555 20150811_123711

If you’ve eaten before (and I know you have!), you must know you need plates. For everyday meals, serving things directly from their pans onto your plates is just fine. But one of these days you’re going to want to cook to impress someone and on that day, you’ll want some serving dishes. And by serving dishes I mean platters and bowls. A platter is a great big plate meant to hold the main dish. It’s usually at least 50% larger than a regular dinner plate and can be much larger than that. You should have at least one. Prices for new start at about $10 and go up from there. Vegetable bowls are for your side dishes. They’re generally about two or three times the size of cereal bowls. Get at least two. New ones start at around $5 and go up. Don’t get too concerned if your serving dishes don’t match your regular dishes. Mismatched pieces look funky and cool. The best places to look for gently-used serving pieces are garage sales, junk stores and Goodwill. You’ll find gorgeous pieces for next to nothing; my favorite platter cost me $1 at my local “antique” store.

A serving fork

20150811_124043

A few posts ago (Equipping Your Kitchen…Part 3: Sharp Things) we talked about carving knives. I told you that carving knives sometimes come in sets with big pointy forks. This is the fork I’m talking about. It’s also known as a pot fork. They’re about a foot long with the tines (usually two) making up about 3 inches of that length. They’re designed for holding a big hunk of meat steady while your slice it, then serving up those slices of meat once it’s carved. It’s also pretty handy for lifting up an entire roasted chicken from a pan. If you’re lucky, one came in a set with your carving knife. If it didn’t, one by itself costs about $10.


A pasta server

pasta serverPasta servers (also known as a spaghetti server or a pasta rake) are one of the more unusual looking tools in the kitchen. They’re a bit like a slotted spoon, but with fingers sticking out all around the bowl. When you scoop the server in your pot of boiling pasta, those fingers are meant to hold onto the long strands (spaghetti, linguine, fettuccine, angel hair) so you can retrieve them without dumping out the entire pot. This lets you take a single noodle out to test it for doneness or to serve the pasta itself while keeping the water. (Pasta water is useful while making sauces; more on that another time.) It’s a pretty specialized tool, but it’s handy. Expect to pay about $5 to $7 for one.


A pie server

pie serverA pie server is a small turner with a triangular blade shaped like a piece of pie. The blade should be pretty flexible so you can slide it underneath the most fragile pie crust with relative ease. Many have serrations on one side so you can use it to slice the thing you’re planning to serve. If you think a pie server sounds suspiciously like our serving spatula from a few paragraphs ago, they do share a lot of similarity. Here are the differences: 1) A pie server is pointier at the tip than a serving spatula, and 2) Pie servers are nearly always made of metal, although I’ve seen a few nylon ones recently. Getting a pie server is determined solely on how often you think you’re going to serve wedge-shape foods. Perfectly lovely ones can be had from $7 to $10.


And now a few words about cooking (and serving) utensil sets…I’m all for them. In my humble opinion, they’re a great way to get all the recommended tools at once for a very reasonable price. I’d stick with sets of 4 to 7 items. These sets usually have a turner (solid or slotted), a serving spoon, a slotted spoon and a ladle. Larger ones may add a skimmer, a pasta server and maybe a rubber spatula. I was digging around on Amazon.com and saw several really nice sets of high quality tools for $20 to $25, which drops your price per tool to around $3 to $6 each…sweet!

Now you’ve got the scoop on all kinds of serving tools. Next time…a plethora of awesome gadgets!

Equipping Your Kitchen…Part 6: Tools for Actual Cooking

You’ve got the pans. You’ve got the bowls. You’ve even got measuring stuff. All good stuff, but, unless you’re planning to turn your fried chicken with your fingers, you’re going to need some implements for dealing with hot things in the pan. So, today, let’s talk about…

Tools for Cooking

Cooking tools are for maneuvering your food in the pan and protecting your delicate flesh from hot, hot things. Here’s what I consider necessary for everyone.

A pair of tongs

20150805_175606

Tongs might be the single most useful gadget in your kitchen. They’re essentially an extension of your hand that can manipulate things in hot places; flipping meat in the pan or on the grill, stirring pasta while it’s boiling in the pot, retrieving baked potatoes from the oven…the possibilities are endless. There are two main styles: ones like scissors and ones like tweezers.


20150805_175741

The scissors type are your Great Aunt Tilly’s tongs. They have handles like scissors and operate the same way. I have to say that, in cooking situations, they’re only slightly better than having no tongs at all. It can be very difficult to get a good grip on things with these, which defeats the entire purpose of tongs. The only kind of scissor-style tongs I use with any frequency are my salad tongs.


← NO!


20150805_180459

The infinitely-preferable tweezer kind are either made from one long piece of material (metal, plastic, nylon, bamboo, etc.) folded in the middle or two pieces of material (usually steel) hinged at the end. The hinged version is generally spring-loaded and often has a lock to hold the tongs closed for easy storage.


20150805_180537

There are a couple of kinds of lock used on hinged tongs. I’m not a fan of the type with a sliding ring. It tends to deploy itself at the worst possible time.


← Also NO!


I much prefer the pull-ring locks. Push the ring in and the tongs open wide. Pull the ring up and they remain closed. And they won’t spring open unless you want them to…awesome!

20150805_180618 20150805_180607

They come in a lot of sizes, but the most useful are 9 inches (good for everyday tasks) and 12 inches (good for the grill and getting things from the back of the oven). Be sure the tips are scalloped, not saw-toothed, for best gripping power.

20150805_180739 20150805_180643

20150805_180756

And if you plan to use them in your non-stick pans, consider getting tongs with silicone-coated tips so you don’t scratch the coating.


Best of all, you don’t need to spend much to get good ones. You should be able get a single pair of tongs for less than $10 or a set with two sizes for under $15.

A spatula (part 2)

20150805_181316I can hear it now…”I already have a spatula. Why do I need another one?” Yes, you have a spatula…a rubber spatula. In an effort to confuse you as much as possible, the word “spatula” has several meanings. So now you need an entirely different kind of spatula. The kind we’re talking about today is also called a turner and it’s for sliding under a piece of cooking food to turn it over or moving it to another location. And, yes, there are about a hundred designs for them. What they all have in common is the offset angle built into them so you can get the spatula under the food you want to turn without burning yourself or destroying the food. The angle can either be built into the handle or into the tip of the blade, but it’s always there. There are two styles I’m particularly fond of, the pancake turner and the fish spatula.


The pancake turner has a wide blade (either solid or slotted) and a good angle between the blade and the long-ish handle. These are great for fairly robust foods like pancakes (duh!), grilled cheese sandwiches, hash browns and burgers.

20150805_181427 20150805_181412

More delicate foods do better with a fish spatula. A fish spatula has a triangular blade with an angled tip, a lot of slots and a straight handle. The angled tip of it lets you get under fragile foods like fish filets or fried eggs without tearing them.

20150805_181440 20150805_181517

Get these spatulas in nylon or silicone so they’re safe for all surfaces. Neither should cost more than $10.

A colander

Some would say that a colander is just a bowl with holes for draining stuff. To those folks, I would say that’s essentially true. But the holes themselves make all the difference.

20150805_181625Many colanders, especially plastic and silicone ones, have holes that are way too big. You might think that larger holes equal better drainage and that’s true up to a certain point. But if you’re draining something with a small diameter like angel hair pasta, orzo (rice-shaped pasta) or rice in a colander with larger holes, you’re going to drain away a fair amount of product along with the water. So it turns out that lots of small holes work better than a few large holes. And to get a colander with lots of small holes, you need to turn to metal, specifically stainless steel. Steel, however, has a couple of problems. It’s pricey and it gets hot when you pour hot liquid in it, which is what you’ll do to your colander nearly every time you use it.

So, let’s go over the pros and cons of each kind:


Stainless steel

stainless steel colander


Pros: Sturdy, small holes, built to last

Cons: Expensive, gets hot, takes lots of cabinet space


Plastic

20150805_181620


Pros: Sturdy, inexpensive, stays cool

Cons: Large holes, cabinet space hog


Silicone

20150805_181736


Pros: Collapsible for storage, stays cool

Cons: Large holes, often flimsy, pricier than plastic


To get and maintain better generic viagra buy erections you need a greater blood flow filling the capillaries of the penis. The members may act either as agents for their customers, or as principals for their own accounts. levitra 10 mg The addition of low cost Kamagra means you can achieve erections when you are sexually aroused and that s when he comes to know or he should make out the fact that he is facing generic sildenafil viagra erectile dysfunction or impotence in his life. Therefore, the Pacemaker Implantation generic viagra from usa comes as a rescue to the dangerous heart condition.  


A colander is often a purchase a cook makes once. In my mind, a purchase like that deserves a few extra dollars to get a good one that’ll last for years but not everyone’s budget will allow that. If budget is your primary concern, look for a plastic colander, specifically one called a rice washer. They’re very inexpensive and they have small holes, so product loss isn’t in question, but they’re not the sturdiest option available. A good sized one (5 quarts) costs between $7 and $10. If storage space is a problem, consider a silicone colander. There are several styles available, including one that’s designed to fit over your sink for stability. But they have large drainage holes, so be prepared to lose a few strands of spaghetti or grains of rice down the drain when you use it. You’ll want the sturdiest one you can find so it won’t collapse at an inopportune time. They run from $15 to $30. If durability is your thing, go for a stainless steel one. Make sure it’s dishwasher safe, has small drainage holes or is made of mesh and won’t dent easily. Highly rated ones run $25 to $30.


A sieve

sieveColanders are awesome for draining large amounts of things, but what if you need to separate an entire jar of pickles from its brine? For smaller tasks like that, you need a sieve or strainer. A sieve is fine mesh (like a window screen) bowl with a long handle and is nearly always made of stainless steel. There are varying sizes of mesh, but they all have holes smaller than your colander. And they’re good for more than just daintier straining. I use mine for sifting flour for certain recipes, putting a light dusting of powdered sugar on desserts and washing quinoa. Happily, sieves don’t cost much. You can get a single one (get one that’s at least 3 or 4 inches across) for around $5. They also come in sets of 3 various sizes for around $10 to $15.


A pair of potholders

red potholderAh, the humble potholder! It’s often an afterthought in the kitchen with cooks opting for something to go with the décor or ones your grandma crocheted for you. There’s nothing wrong with pretty or handmade potholders as decorations. Hang them on a hook and admire them while you spend a few moments thinking about whether you want to remove a screaming hot pan from your 500° oven with something made from materials obtained at Yarn Barn. If you make your living with your hands (like I do), you’ll want a lot more protection than that. Potholders should be thick enough to protect from high heat, but still allow enough dexterity to easily grip a heavy pan. They need to have a pocket in the back for your hands so the potholder doesn’t shift while you’re trying to use it. They need to be machine washable because, at some point, they’re going to get yucky. Silicone seems like it would be the way to go, but they’re often too stiff to be much use and they rarely have pockets so they can seem unwieldy. I like ones made of heavy cotton batting, although I’ve seen some recently with a thin layer of silicone on the outside for an extra layer of protection.


oven mitt


For those looking for even more security, think oven mitts. These are the potholder’s cartoon mitten cousins and provide the safety of a pot holder all the way up your wrists. But you lose some dexterity for that extra coverage. I prefer pot holders to oven mitts, but that’s just me. Either way, remember that you’ll need two of them to be useful. Expect to spend around $15 to $20 for a really good pair.


A trivet

What the heck is a trivet? It’s a buffer zone between your hot pan and a vulnerable surface like your countertop, like a heat-resistant coaster. They come in a stunning array of shapes, sizes, varieties and materials. They also come in a stunning array of prices, ranging from under $5 to over $50.


expensive trivet

The really expensive foo-foo ones are often made of enamel-coated cast iron. This strikes me as odd because the entire point of a trivet is to insulate and cast iron (or metal in general) is a terrible insulator.


← These babies retail for about $60! Each!


20150805_204653


Beautiful and somewhat less expensive ceramic trivets are excellent insulators, but they’re often tippy and pans tend to slide around on them.


Better choices are the much more budget-friendly wood, bamboo, cork and silicone. Wood, bamboo and cork are excellent insulators and they look pretty stylish, too.

cork trivet


Cork ones are the least expensive option with packs of three going for less than $10.


trivets


Wood and bamboo trivets are also easy on the wallet. A set of two goes for somewhere between $10 and $15.


20150805_181954


Silicone trivets are my favorites. They stay in place, keep the pan from sliding around, are incredibly heat resistant and clean up easily. In fact, this is why I own silicone potholders; they’re fantastic trivets. (Bonus: They’re also awesome for opening troublesome jar lids.) A set of four colorful silicone potholders costs about $10.


silicone trivet


There are also tons of other cool silicone trivets; they run from $5 to $15.


We’re nearly ready to actually cook something. There are a few other things in my kitchen that I use from time to time and I have to admit they’re pretty handy to have. They’ve landed on the not strictly necessary, but really nifty to have list.

A steamer basket

steamer basketThere are a lot of ways to cook food: frying, roasting, boiling, etc. But some things just need to be steamed. It’s a remarkably healthy way to cook since this process adds no fat to the food. And it’s a very gentle way to cook delicate foods like fish or dumplings. For the best results, you need a steamer basket. They look like someone cut up a colander and made a flower out of it. The petals of that flower allow the steamer basket to fit in nearly any size pot. They also have little feet on them to keep the basket out of the liquid at the bottom of the pan and handles so you can retrieve the basket when the food is cooked. Most are made out of stainless steel, while a few are made of plastic or silicone. I’d steer clear of the plastic or silicone ones, though. The silicone ones are flimsy and the plastic ones tend to melt if the heat gets too high. Some of the stainless ones have silicone coatings on the feet and/or petals to make them safer for nonstick surfaces. I’ve never had any trouble with my stainless one scratching my nonstick pans…just be careful and you should be okay. A sturdy one with a good handle runs about $10.


A splatter screen

20150805_182201

A splatter screen looks a little like a giant ping pong paddle made out of window screen. The idea behind it is that it helps to keep you from getting popped with blistering hot oil, tomato sauce, etc. while you’re cooking. The mesh needs to be small enough to keep painful and messy blobs of goo from flying out, but large enough to allow steam to escape. The one you choose needs to be at least 1 inch wider than the largest pan you think you’ll use it on and have a handle that’s sturdy without being too heavy. A too-heavy handle makes the screen tippy and ineffective. Well-reviewed splatter screens cost about $15.


A skimmer

20150805_182119There are times when you cook food in a large amount of liquid that you don’t want to drain completely away all at once or remove the cooked food a little at a time, like boiling ravioli or deep frying hush puppies. Wouldn’t it be cool if you had a mini-colander on a long handle for a time like that? Well, today’s your lucky day because just such a tool exists! It’s called a skimmer or a spider (because the wire mesh sometimes looks like a spider web). It allows boiling water or oil to drain away while you safely flip your food over or retrieve it from the pan. I have a plastic one (I bought it at a drug store for $1) that I use in nonstick pans and an Asian one that has a brass basket and a bamboo handle (about $7) for my stainless pans.


Now you’re all set with a basic set of tools for cooking your food. Next time…tools for serving!

Equipping Your Kitchen…Part 5: Stuff for Measuring

We’re getting ever-so-close to actually making something! But most recipes, especially if you’re baking, need you to accurately measure your ingredients for the best and most reliable results. And some will also require cooking those carefully-measured ingredients to a certain temperature or for a specific amount of time. So, today, let’s talk about…

Tools for Measuring

Just about all recipes have one thing in common; they need the cook to accurately measure something. It’s not just specific amounts of particular ingredients, but also the temperature and length of time you cook those ingredients. To get reliable and repeatable results, you need a variety of tools to measure all those things. Here’s what I consider necessary for everyone.

Measuring cups

To the uninitiated, measuring cups are all the same. I mean, a cup’s a cup…isn’t it? Not really. There are two main types of measuring cups, ones for measuring dry things and ones for measuring wet things. You really can’t have too many of either kind. I’ve never heard anyone say “Boy, I wish I didn’t have so many measuring cups.” Let’s talk about the kinds you need.

Dry measuring cups

20150719_175851

The cups you use for measuring flour, sugar and other dry ingredients are cleverly called dry measuring cups. They come in sets of 4 to 7 cups of various sizes, stack together for easy storage and often hook together. Sets of four are the most basic and have these sizes: 1/4 cup, 1/3 cup, 1/2 cup and 1 cup. A set of seven adds a 1/8 cup, a 2/3 cup and a 3/4 cup to the basic 4 sizes. As far as materials go, steer clear of wood & ceramic ones (beautiful, but impractical) and turn your attention to plastic and stainless steel. They’re the most popular materials for this type of measuring cup.


My main factor in determining which cups to buy: how the handles attach to the bowls. The proper way to use a dry measuring cup is to overfill the cup with your ingredient (either by scooping or spooning) so it heaps a little way above the rim of the cup, then use a flat edged implement (like a table knife) to level off the ingredient flush with the top edge of the cup. This leveling is difficult to do if the handle sits above the rim of the cup.

This is good                                                                      This is bad

20150719_180147 20150719_180035

I have at least 4 sets of dry measuring cups in my kitchen; you can quickly tell which ones were gifts and which ones I bought myself by the handles. I also prefer cups that have the measurements written clearly (or even color-coded) on the handles; so much better than having it only on the bottom of the cup. There’s a wide variation in prices; I’ve seen plastic sets of 4 for as little as $1 and stainless steel sets of 7 for over $50. Are $50 measuring cups going to make you a better cook? Probably not, but $1 cups might make you a worse one because they’re often inaccurate. Just find nice, sturdy ones with decent handles…they shouldn’t be more than $8 to $10. And don’t be afraid to have more than one set…you can thank me later.

Wet measuring cups

20150719_180327Liquids and viscous ingredients (like honey or oil) are measured with wet measuring cups. (A little tip: You can measure wet things in dry measuring cups, but don’t measure dry things in wet measuring cups.) Traditionally, these cups have a handle on the side, a spout, markings on the outside and are made of clear glass or Pyrex. They’re heat-resistant, microwave safe and really inexpensive. Even if you never eat anything but those Styrofoam ramen noodle cups for the rest of your life, please get at least one 2-cup glass measuring cup for boiling water in the microwave. You won’t be sorry. They come in a lot of different sizes, but I recommend getting at least one each of the 1-cup, 2-cup and 4-cup sizes. You can buy them individually if you want, but they also come in sets. Any major retailer will have them and the set won’t set you back more than $15.


20150719_180658


And now that I’ve waxed rhapsodic on the virtues of Pyrex measuring cups, I’d like to spend a few moments talking about my very favorite wet cups…which happen to be plastic. I don’t usually mention brand names, but the wet measuring cups made by OXO are a step above any others I’ve ever owned and the way they’re designed is why. The main knock against traditional glass cups is the markings. They’re on the outside of the cup and you have to bend down to eye-level with them to accurately read the measurements.


20150719_180732


OXO put the markings on the inside of the cup, so you stand up, look straight down in the cup while you’re pouring stuff in it and still accurately see the markings…genius! OXO cups come in a wide variety of sizes (one of my favorite ones is a 1/4 cup one with teaspoon and tablespoon markings) and also come in sets. A set of 3 with 1-cup, 2-cup and 4-cup sizes runs about $20. That spiffy 1/4 cup one is about $5.


Measuring spoons

20150719_182742

Unlike measuring cups, measuring spoons can be used for either wet or dry ingredients and are used much like dry measuring cups except the volumes are much, much smaller. Measuring spoons are something most people buy once and use for a lifetime. Even very inexpensive ones are generally calibrated correctly, so inaccurate measuring typically isn’t a problem. Every set I’ve ever owned came on a ring and nested together for storage. Sets generally have a minimum of 4 spoons with these sizes: 1/4 teaspoon, 1/2 teaspoon, 1 teaspoon and 1 tablespoon. Others will have as many as 6 and add 1/8 teaspoon and 1/2 tablespoon to the mix.


This is good                                                                      This is bad

20150719_19164820150719_191600

Using measuring spoons for dry ingredients is just like using dry cups; overfill, then level off. With that in mind, be mindful how the handles attach to the bowls just like you do with dry measuring cups. I have no preference for steel over plastic (I own 6 sets; 3 are plastic and 3 are metal). Just make sure the measurements are clearly marked and that the spoons have handles long enough to get into spice bottles. You can get a really nice set of them for around $5.

An oven thermometer

oven thermometer


Most new ovens are pretty accurate when it comes to temperature; you set the dial to 325°, it’s fairly close to 325°. But a lot of things can throw an oven out of whack, especially if they’re old. I once had an apartment with an oven that ran a whopping 50° hotter than it was supposed to! How did I know this? After I burned the first 10 things I tried to bake in it, I invested in an oven thermometer. It’s the only way you can be sure what’s going on in there. Get one that’s easy to read. Happily, they cost less than $10.


An instant-read thermometer

20150719_192108There are a lot of foods that can look done on the outside, but are still dangerously undercooked on the inside. (Chicken is one that comes screaming to mind.) The best way to determine if your food is cooked to the proper temperature is with an instant-read thermometer. They have a long, thin metal probe that’s connected to a readout and is intended to be inserted into something, read, then removed. There are analog ones…stay away from those. They’re slow and often inaccurate. Get a digital one. Within a few seconds, you’ll know precisely what temperature your food is. Get one with a nice, easy-to-read face and a probe that’s at least 4” long. These run anywhere from $5 to $20.


A kitchen timer

Nearly every recipe you’ll ever see will have instructions telling you to do something for a certain amount of time; beat for 3 minutes, sauté for 5 minutes, roast for 2 hours, etc. The best way to keep track of all that is with a kitchen timer. Timers come in both analog and digital versions.

analog timer apple timer owl timer

Analog ones are mechanical (like little wind-up alarm clocks) and they come in every conceivable shape and color. They can be a cute way to add a little personal flair to your kitchen. Their downfall is that you can’t set one more precisely than a full minute at a time.

digital timer


Digital ones are battery powered and more utilitarian looking, but can be precisely set down to the second. I’m partial to the digital kind. Pick whichever kind floats your boat as long as it’s easy to set and easy to read. Price points vary wildly, so expect to spend anywhere from $5 to $25 on one for your kitchen.


The wounding process may viagra for sale online be subtle as there may be problems of mobility, and transportation. It is all that much viagra 25 mg less expensive than the brand-name original. An unknown village in Nubra valley levitra from canadian pharmacy Visit the magnificent village of Turtuk, which is nestled among the high mountains of the Nubra valley. Kamagra It is a generic version of the genuine product which is vital when buying any prescription medicine, as it is related to your better health. pop over here levitra 40 mg is guaranteed to be a safe way to cure erectile dysfunction and improve sexual life.
That gets you pretty well set for all your measuring needs. But, there are a few of others that can make things easier or a little more fun. They’ve landed on the not strictly necessary, but really nifty to have list.

Non-traditional measuring cups

In addition to the traditional versions we talked about earlier, measuring cups now come in a dizzying array of shapes, sizes and materials. I have a fairly serious measuring cup addiction and pick them up whenever I see a cool new one. You can decide if adding any or all of these fits your lifestyle and budget as you run across these. Here are a few of my favorites:

Beaker-style

20150719_180926


Beaker-style cups make you feel a little bit like a mad scientist. These are generally used for wet ingredients. This 2-cup version looks super cool and came with a lid. These teensy ones could take the place of measuring spoons.


20150719_181745


And here’s a 2-cup one that looks like a pint glass…love that one!


Plunger-style

20150719_181215


Plunger-style cups are especially effective for sticky ingredients like honey, gooey ones like mayonnaise or solid fats like butter or shortening. Simply adjust the plunger floor to the proper measurement, then fill it up to the rim. Then, you just push the contents out by pushing the plunger to the top of the cup and scrape any remaining stuff off the floor. I have three of these; two of them hold up to 2 cups, the third only holds up to 1 ounce.


Silicone

collapsible cups


Silicone cups come in several varieties. One popular style is collapsible dry measuring cups (measuring spoons, too!). Keep them in their flat state until you’re ready to use them, then pop them open. When you’re ready to put them away, mash them flat again. They’re super handy if you have very limited storage space in your kitchen.


20150719_181016


I also have a couple of beaker-like silicone measuring cups for wet ingredients. Squeeze them gently and they form a spout…how cool is that!


Mini measuring cups

20150719_181453


Mini measuring cups are just that: mini versions of larger cups. My largest one holds about 6 ounces; the smallest is a teaspoon. Most of them hold 1/4 cup (2 ounces) and have teaspoon and tablespoon measurement markers. They’re handier than they sound and I use mine all the time.


A probe thermometer

probe thermometer


We talked earlier about how instant-read thermometers are meant for quickly taking something’s temperature, then removing the thermometer. Unfortunately, they usually have plastic casings that aren’t oven safe. What if you need to monitor the temperature of something over a long period of time? Enter the probe thermometer. It’s similar to an instant-read thermometer, but instead of having the probe attached directly to the readout, it’s attached to a heat-safe cable so the delicate electronics involved are far away from the heat source. There’s absolutely no better way of determining when something big and lumpy (like a turkey or a roast) is done than with one of these puppies. Mine has a timer built into it as well. They cost around $20.


A digital scale

20150719_192248

There are a lot of recipes out there that require more precise measuring than your cups or spoons can provide. Or your ingredient might be ill-suited for measuring in a cup, like spaghetti. If you need really precise measuring, nothing beats a digital scale. If you decide to go this route, here are some features you’ll want your scale to have: 1) An easy way to toggle between metric and standard weights, 2) A tare function which allows you cancel out the weight of the bowl holding your ingredient or zero out the scale so you can measure several things at the same time. 3) A nice big readout. You should be able to get a nice one for less than $20.


Now you should be able to measure anything in your kitchen. Next time…tools for cooking!

Equipping Your Kitchen…Part 4: Stuff for Mixing

Checklist of things you should have now: pots & pans…check!…bakeware…check!…sharp things…check! Time to mix it up! Today, let’s talk about…

Tools for Mixing

This particular category encompasses a fairly wide variety of items: bowls, spoons, whisks, spatulas, etc. What they all have in common is their usefulness for combining ingredients together. Here’s what I consider necessary for everyone.

Mixing bowls

Mixing bowls may not be the sexiest things in your kitchen, but no kitchen can function without them. A good bowl should be so durable and comfortable that you hardly even notice it when you’re using it. You need a minimum of three, small (1 to 1-1/2 quarts), medium (2-1/2 to 3 quarts) and large (4 to 6 quarts). But you really can’t have too many of them, so don’t be afraid to buy them in sets of assorted sizes. In this case, sets are awesome because they all nest together for easy storage. The first thing to consider when making your choice is material. There are 5 main kinds of materials used to make mixing bowls – stainless steel, glass, ceramic, plastic and copper. We’re only going to talk about 4 of those because copper is mind-bogglingly expensive and difficult to maintain. Each kind has its pros and cons…let’s go through them one by one.

Stainless steel

steel bowls

Stainless steel bowls have a lot going for them; they’re generally lightweight, inexpensive, extremely durable and oven & dishwasher safe. They don’t react with acidic foods and are non-porous so they don’t pick up smells. They can even be put to use as a double boiler (what a double boiler is and why you might need one will be covered in another post). I have three minor complaints with stainless steel bowls: 1) You can’t see the bottom to make sure you’ve mixed everything together; 2) They transfer heat so you have to take special steps if you’re trying to keep something a certain temperature while you’re mixing it; 3) You can’t put them in the microwave. If you choose stainless steel, beware of ones with rubber-coated bases. You’d think it would make the bowl more stable, but it really doesn’t. It also makes the bowl no longer heat-safe.


Glass & Ceramic

glass bowls


These two materials share a lot of the same properties, so I’m going to lump them together. On the down side, they’re heavy, prone to chipping or breaking, sometimes slippery and often pricey. On the up side, they’re non-porous, non-reactive, can be used for that double-boiler thing I mentioned earlier and are both dishwasher and microwave safe. They’re also good insulators, so keeping hot things hot and cold things cold isn’t the problem it can be with stainless bowls. The glass and ceramic bowls I own are pretty, so they make really nice serving pieces. The main difference between the two materials is opacity; glass is clear and ceramic isn’t. With glass, you can see the bottom of the bowl which is handy when you’re trying to make sure you got everything really mixed together.


Plastic

batter bowl

Plastic bowls get a bad rap. Since plastic is slightly porous, some cooks claim they absorb oils and odors. I have several plastic bowls and I’ve never noticed any greasiness or smells, but I take good care of my bowls for this very reason. In fact, my very favorite mixing bowl is a heavy (but still lightweight compared to metal or glass) melamine one with a handle and a spout. It’s called a batter bowl and it’s just fantastic to work with. The handle allows you to get a good grip for stability and the spout makes it easy to accurately get whatever you just mixed up out of the bowl. It’s my go-to bowl for pancakes, waffles, cakes, muffins and brownies…all kinds of batters. (I guess that’s why they call it a “batter bowl”.) Batter bowls are also made in glass and they’re just fine, but they’re a lot heavier than plastic ones. That can be important when you’re holding one up while scraping the last of that precious batter out of the bowl. Get one that’s at least 2 quarts in size, 3 quarts is even better.


Here are a few things to consider when deciding on which bowls you want. 1) If you’re a bit height-challenged like me (I’m really short), you might want bowls with shorter sides that slope gently to the bottom. They’re more comfortable to use and easier to scrape. Bowls with taller, more vertical sides are harder to reach into and have to be tilted nearly upside-down to get everything out. 2) If you’re trying to decide between two sets of bowls and the only real difference between them is one set has lids and one set is without lids, always opt for ones with lids. You’ll be glad you did. 3) Bowls with rims are easier to pick up than ones without them.

rim vs no rim

                                     Bowl with rim                                                                                                    Bowl with no rim

This is especially important with glass or ceramic bowls because those things can be slicker than a greased weasel if you’ve got any goo on your hands. Since bowls aren’t something you really need to get your hands on to pick good ones, don’t be afraid to buy them online. You might be able to catch a good deal on some great bowls. Now for prices; a set of nice stainless steel bowls can be had for less than $20. A set of glass ones (I like Pyrex ones because they’re oven safe and usually come with lids) run around $25. Ceramic bowls tend to be pricey. I haven’t seen a decent set for less than $40 and they just go up from there. A really nice melamine batter bowl will cost around $15.

Wooden spoons

wood spoons

The humblest tool in your kitchen is the wooden spoon. They’ve been around for hundreds of years with very little change in design over the centuries. They’re heat-resistant, safe for even the most delicate non-stick surface and inexpensive. Most of them are made of beech, acacia or bamboo. I’ve seen a few that are made of olive wood, but they tend to be pricey and aren’t any better than ones made of the more popular woods. Wooden spoons have a myriad of uses, from stirring risotto to squishing cookie dough ingredients against the side of your mixing bowl to scraping up yummy bits from the bottom of your beautifully seasoned cast iron pan. And they’re excellent insulators, so you won’t burn your hand on the handle no matter how long you leave it in the boiling hot soup. Splurge (“splurge” being a relative term since wooden spoons are less than $5 each) on good, stout ones and avoid ones that are lighter than they look like they should be. Sturdy, comfortable handles are essential. Skinny spindly handles can break easily and are tiring to hold when you’re stirring something for a long time. Look for ones with heads that aren’t too wide (that can be like stirring with a ping-pong paddle) and have an overall length of at least 10”. Good wooden spoons are extremely durable, but that doesn’t mean you can put them in the dishwasher. If you want to be able to hand your spoons down to your grandchildren (and I have some of my grandma’s spoons), do the spoons a favor and hand wash them. They’ll thank you by lasting nearly forever. A whole set of really good spoons is less than $10.

Rubber spatulas

red spatula
Rubber spatula

Whether you’re scraping cake batter out of your mixing bowl or making an omelet, you’re going to want a rubber spatula. Actually, “rubber” spatula is a misnomer because most of them have heads made of heat-resistant silicone. But I’m still going to call it a rubber spatula because that’s what my grandma called it and it differentiates it from the dozen other kitchen tools also called “spatula”. This particular kind of spatula has a flexible head and is used for scraping and mixing. They come in a huge variety of sizes and blade shapes, but they all have one thing in common: the head has at least one curved corner for scraping the bottoms of bowls. Many, but not all, also have one squared-off corner for scraping the corners of saucepans. The head needs to be flexible enough to get all the batter out of the bowl, but rigid enough to scrape brown bits off the bottom of your skillet. The most popular and versatile size has a head that’s about 2” wide by 3” long and a handle that’s about 10” long. I have a couple of them this size and I love them.

blue spoonula
Spoonula

But, by far, my favorite rubber spatulas are a hybrid of spoon and spatula cleverly called a spoonula. They have all the benefits of a regular spatula, but have a concave back so you can scoop up a small amount of whatever you’re stirring. I have at least 4 of them and I love them all. Handles should be comfortable in your hand and easy to clean. I also prefer my spatulas to be colorful for 2 reasons; 1) They’re pretty and 2) They don’t show stains as easily as white ones do. A set of 3 or 4 of them should run you between $10 and $15.

He had no insecurity issues and was perfectly comfortable with his cialis on line australia deeprootsmag.org girl talking to other guys. Another result that would also give them the cheapest tadalafil 20mg opportunity to achieve and maintain a hard erection. Unhappiness due to relationship, and poor communication, and lack of interests towards co-partner also leads to obstruction of the act. http://deeprootsmag.org/2014/09/15/hearts-flux/ ordering levitra A series of misunderstandings and bad decisions challenge Brandon to contemplate taking drastic, inconceivable measures, and ultimately he seeks revenge against his powerful father. http://deeprootsmag.org/2017/01/15/the-zito-doctrine/ cheap viagra Whisks

Whisks are essential when you want to make a smooth sauce, thoroughly mix a batter or make fluffy whipped cream. There’s something very satisfying about whisking something by hand. It makes you feel like a real chef. Whisking by hand also lets you keep a close eye on what’s happening to your ingredients. There are about as many kinds of whisks as there are fish in the sea. They come in a tremendous variety of sizes and shapes. Each type has a specific, specialized purpose, but there are two kinds that are the most versatile and popular.

Balloon whisk

balloon whisk


This is the one you think of when you of a whisk. It’s big and bulbous and has lots of fairly flexible wires. Its primary use is to incorporate a huge amount of air into whatever you’re beating, so it’s best for whipping cream or egg whites by hand. If you want to have only one whisk, this is the one to get. Get one with at least 10 wires and a comfy handle.


Sauce whisk

sauce whiskThis one looks like a balloon whisk that went on a diet. It has a much narrower head than a balloon whisk which allows you to get into corners of pans. The wires are more rigid than the ones in a balloon whisk and that makes it better for working with heavy liquids, like sauces or gravies. It can be used like a balloon whisk, but it’ll take a lot more effort to aerate your cream or egg whites. This one also needs to have at least 9 or 10 wires to be really effective.


Happily, whisks aren’t very expensive so I recommend you have both kinds. It’s worth it to mention that you can get whisks with silicone-covered wires to protect your non-stick pans. Excellent versions of both whisks with good handles cost less than $10 each.

These items will allow you mix just about anything. But, there are a couple of others that can make quicker, easier work of putting it all together. They’ve landed on the not strictly necessary, but really handy to have list.

An electric hand mixer

hand mixer


Hand whisks are awesome, but using them for all your beating and whipping can be taxing and leave you with forearms like Popeye. Electric mixers are the motorized version of a whisk. They combine and aerate ingredients much faster than you can with just the power of your arms. Get one with 3 to 5 speeds; any more than that just isn’t necessary. You can get a really good basic model for less than $30.


An immersion blender

immersion blender


Everyone knows what a blender is; an electric appliance with a pitcher that you make delicious margaritas in. Technically, that’s called a bar blender. This isn’t what I’m talking about. An immersion blender is a handy dandy blender you hold in your hand. You can puree soup while it’s still in the pan, make a perfect smoothie right in the cup or homemade pesto in a jiffy. It doesn’t have to be a complicated one (two speeds are sufficient) or an expensive one. It just needs to be comfortable in your hand and, after a teeny bit of practice, you’ll wonder how you did without it. A basic model should be around  $20.


So there you have it! With these tools, you should be able to mix up anything your heart desires. Next time…tools for measuring!

Equipping Your Kitchen…Part 3: Sharp Things

We’ve already talked about things to cook your food in. Now it’s time to begin discussing food preparation tools. Today, let’s talk about…

Sharp Things

There are two kinds of sharp things in your kitchen: knives & not-knives. The word knife is pretty self-explanatory. I think we all know what knives are. Not-knives encompass a wide variety of things you can use to cut things up that aren’t knives; graters, peelers & shears fall in this category. We’ll talk a little about cutting boards & knife sharpeners as well. Good knives can be pricey, so it’s good news that the list you really need is short. Here are the ones I consider necessary for everyone.

A chef’s knife

chef knife 1
Chef’s knife

Close your eyes and think about a chef chopping something up…now think about the knife in the chef’s hand. That’s a chef’s knife. It’s the most versatile knife in your kitchen. They come in several sizes and types, but an 8” or 10” one should do the trick for you. It’s important to get one that feels good in your hand because you two are going to do a lot of prep work together. It’s the knife you’ll use to chop up veggies, slice meat, smash garlic…you name it. As you get used to yours, it’ll feel like an extension of your arm and it’ll feel weird when you use someone else’s knife. It’s also important to find one that has a good, solid grip. Trust me, a knife is not something you want slipping around while you’re chopping.

Santoku knife

There are two main types of this kind of knife: a regular chef’s knife and a santoku. A santoku is a Japanese version of a chef’s knife and has a few structural differences from a regular chef’s knife. If you take a look at a chef’s knife, you’ll see that the blade curves up at the tip to meet the top of the knife. That curve is much less pronounced on a santoku. You can also see little vertical grooves on the santoku’s blade. Allegedly, the grooves are supposed to keep food from sticking from the blade. I don’t know if that’s actually true, but they do look cool. I have both and tend to use my santoku more than my standard chef’s knife, but it’s a totally subjective thing. It’s much more important to get the one that feels best in your hand and fits your budget. Now, about that budget… Knives are not a place to skimp. That being said, you don’t necessarily need to spend a fortune on your knives. I would suggest spending at least $20 to $30 for a decent chef’s knife.

A paring knife

Now it’s time to imagine your Great Aunt Tilly peeling potatoes with a little knife. That one is a paring knife.

paring knife
3 types of paring knives

They generally have a thin 3” to 4” blade that usually tapers to a point. They’re all used for general utility work in the kitchen when a bigger knife just won’t do. They have a lot of different blade shapes, but they mostly do the same things. I also like my utility knife, which is a slightly bigger paring knife.

utility knife
Utility knife

I use mine like I would use a paring knife. It’s a little longer than a paring knife, 4” to 6” long, and just feels better in my hand than the paring knives I own. Whichever one you choose for yourself, a perfectly good one shouldn’t cost more than $10 for a regular paring knife and $20 for the utility knife.

A bread knife

bread knife

I can hear you now: “I’m not baking any bread! Why do I need a bread knife?” Just because you’re not baking bread (yet!) doesn’t mean you won’t ever buy bread that needs slicing. And a bread knife isn’t just for slicing bread. Bread knives have long, thin blades with deep serrations along the cutting edge. The serrations make it able to cut through bread crusts, both soft and crunchy, without smooshing them. It also makes them perfect for cutting through cake, tomatoes, watermelon, etc. You can get a nice one for about $20.

That’s it for knives…I told you the list was short! Now, on to non-knives!

A grater

A grater has always been the go-to tool for shredding cheese and veggies by hand. There are a couple of different kinds, box graters and paddle graters.

box grater


A box grater has anywhere from 3 to 8 sides and each side has holes for different kinds of grating or shredding. It’s probably the kind your grandma has.


paddle grater


A paddle grater is the same idea, but with just one side and one set of holes.


It might seem like a good idea that more sides equals more versatility, but I have to tell you that in a bazillion years of home cooking I’ve never used more than one side of my box grater. Choose for yourself. If you opt for the box grater, make sure it’s fairly heavy duty and won’t slide around while you’re trying to use it. If you go the paddle grater route, it needs to have a comfortable, non-slip handle. You can get either one for less than $15.

A peeler

Technically, you can peel anything with your paring knife. However, a good peeler can make your life a lot easier, especially if you’re partial to mashed potatoes, carrot sticks, apple pie or any other dish that calls for skinless fruits or vegetables. Unless you’re a chef, a peeler does that job much faster and more efficiently than any knife can. Like most things, there are lots of different variations. Here are the two main kinds.

peeler


Standard swivel peelers have a hinged blade that’s parallel to the handle and is probably the kind your Great Aunt Tilly uses.


y peeler


Y peelers have a hinged blade that connects to the arms of a Y-shaped handle. Unlike a swivel peeler, the blade on a Y peeler is perpendicular to the handle.


My peeler is a Y peeler with a ceramic blade. Ceramic is nice for peelers because it stays sharp nearly forever. Its downside is that ceramic can be fragile and prone to breakage if mistreated. Choosing one is a personal decision. All I can tell you is get yourself a nice one and it’ll last you forever. Happily, a nice one won’t cost more than $10.

A pair of shears

shears1

Knives are all well and good, but they can be dangerous and require practice to really master. Shears, on the other hand, have virtually no learning curve (you’ve been using them since kindergarten!) and are actually better at accomplishing certain cutting tasks than knives. I rarely cut something with a knife if I can cut it with shears. (A note on the difference between scissors and shears; it’s all in the handle. Scissors have handles that come straight down from the blades and the handles are generally the same size. This makes them useful for either hand. Shears have handles that are noticeably different sizes (a larger one for your fingers and a smaller one for your thumb) and one is bent upward at an angle for more comfortable use. Shears come in right-handed and left-handed versions.) I have scissors and shears stashed in almost every drawer in my kitchen; they’re that important. You don’t need a particularly fancy pair, but you do need a tough pair. They need to be heavy-duty enough to cut through bone (yes, I said bone!). The very best ones have blades that come apart for easy cleaning. You can get a good pair for less than $20.

A cutting board

Your precious new knife’s edge can be damaged as much from cutting on the wrong surface as that surface can be by being cut on by your knife. A cutting board is a buffer zone between the two. Ideally, your cutting board will protect your knife’s edge and help it maintain its sharpness through months of use. There are a lot of opinions on what kind of board is best. The only one that’s universally hated is glass; it’s slippery and really bad for your knives. Plastic, bamboo and wood all have their advantages and disadvantages. Let’s go through them one by one.


Plastic

plastic board


Pros: Relatively inexpensive. Dishwasher safe for easy cleaning.

Cons: Once a plastic board gets cut marks on it, it’s nearly impossible to get it completely disinfected after use. Also, knife-scarred plastic means plastic is getting in your food. Eww.


Bamboo

bamboo board


Pros: Made from a highly sustainable, renewable resource. Absorbs less liquid than a wooden board, so probably more sanitary. Easy care. Often less expensive than wooden boards of the same size.

Cons: Surface is a bit harder than wooden boards, so may be a little harder on your knife’s edge than wooden boards (jury’s still out on that one).


Wood (usually maple)

maple board


Pros: Most traditional cutting surface. Kind to knives and won’t dull them quickly. Won’t scar easily. Makes you feel like a real chef!

Cons: Renewable, but not as renewable as bamboo. Needs periodic oiling for longest life. Can be pricey.


After all that, here’s what I have in my own kitchen. Recently, I got rid of my old plastic boards and bought a lightweight, dishwasher-safe 14”x11” wood composite board with silicone corners (for stability) for $10.

composite board     This is my new favorite cutting board.


At the same time, I splurged on an 18”x12”, 2” thick bamboo board.

little kahuna     It looks just like this.

(I spent $60 on this board; a similar maple one is over $100.) I haven’t used the new bamboo board yet; I love my composite one that much. I also like color-coded flexible plastic cutting mats if I’m making something with a lot of ingredients.


flexible mat

The color-coding helps prevent cross-contamination (you don’t want raw chicken juice in your freshly chopped veggies…double eww and dangerous to boot) and flexible mats allow you to roll it up and transfer your food directly to the pan. They’re cheap, so when they get scarred you throw them away. A package of 4 is generally less than $10.


With cutting boards, size matters. You need some room to move and anything smaller than 14”x11” is too little to be of much use.

Those items will get you through approximately 99.9% of all your cutting needs. There are a few others that can help make your life in the kitchen a little easier and they’ve landed on the not strictly necessary, but really handy to have list.

A carving knife

slicing knife

Once your family discovers you’re learning to cook, someone is going to ask you to prepare a turkey…or a ham…or a huge roast. And nothing is better for portioning those out than a honking big carving knife. Mine’s about a foot long and could be mistaken for a short sword. I’m not a fan of serrations on carving knives. I feel they just tear the meat instead of slicing it cleanly. Some of them have those cool little grooves in the blade like a santoku…those are just fine. Get one that’s a minimum of 10” long. They come in a huge variety of price points and sometimes they come in a set with a big pointy fork. I wouldn’t bother with the fork unless you love the knife and you’re getting a really good deal on the set. Expect to spend at least $20, maybe more, on one.

A microplane

microplane-zester-640

Sometimes a tool is just too good for just one use. Such is the case with the microplane. When you Google this thing (and I know you will), some of you might think, “Hey, that looks just like the rasp my Uncle Wally uses when he’s woodworking.” Good call! That’s exactly where this thing came from. A chef, who also enjoyed woodworking, took a good look at the rasp he was using on his project and though it would make a super fantastic grater in his kitchen. He was right. A microplane is used when you need to grate something (nutmeg, cheese, garlic, etc.) much more finely than you can with your grater. Get one that feels good in your hand and won’t slip. Remember, each one of those wee tiny blades is wicked sharp and it’s just as easy to grate your fingertips as it is a block of parmesan. They generally cost in the range of $10 to $15.

A pizza cutter

pizza cutter 1
Traditional pizza cutter

Pizza cutters (and by pizza cutter I mean a circular blade on some sort of handle) look like something you would only use for one thing, but are actually awesome multi-taskers. They’re especially good for cutting flat things that aren’t terribly knife-friendly like various kinds of dough, pita bread for dip, quesadillas, even pizza! Even if you never make your own pizza from scratch, they’re great for that frozen pizza you just bought.

pizza cutter 2
Hand wheel pizza cutter

There are several different styles, but the most popular kinds are traditional ones with the handle sticking straight up from the blade and hand wheels where the handle is the housing covering the blade. Choose whichever kinds seems easier for you to use. Just make sure they’re easy to clean (most can go in the dishwasher) and have a blade guard for storage so you don’t cut yourself when getting it out of the drawer. You can get a good one of either type for less than $20.

A knife sharpener

knife sharpener


I bet you were surprised by the picture.


You were expecting to see one of these.

honing steel


This thing isn’t a knife sharpener; it’s called a honing steel. They’re for straightening your already sharp blade.


See, every time you use your knife the sharp edge is bent ever so slightly as a result of coming in contact with your food and your cutting board. The more you use the knife, the more the blade’s sharp edge gets bent. A honing steel literally moves the sharp edge back into place, but doesn’t actually sharpen it. There’s a real skill to using one so that you don’t damage your blades further. So steer clear of the honing steel for the time being. Sharpening can only be accomplished by actually grinding away teeny bits of the blade’s metal, giving it a completely new edge. Most chefs have their blades professionally sharpened a couple of times a year. If you choose to go down this path, expect to pay $5 to $10 per knife. If you choose to get a knife sharpener of your own, please look for well-reviewed ones online and get a good one. The least expensive decent one I’ve seen online is $40.

Now let’s have a few words about knives and knife safety. If you don’t take anything else away from this, please take this: It’s infinitely safer to work with a razor sharp knife than with a dull one. A knife’s blade should slide through your food with very little pressure. If you’re hacking away at something slippery like a tomato or a mango with a dull knife, I can almost guarantee you’re going to cut yourself. Here are some tips for keeping your blades light saber sharp:

  • Don’t cut anything but food with your knives! Don’t use them for opening boxes from Amazon (or anybody else), as screwdrivers, as pry bars, etc. Your knives are for food only!
  • Don’t put them in the dishwasher! No cutting tool in your kitchen, with the possible exception of your shears or pizza cutter, should ever go in the dishwasher. Spend a few calories and wash them, very carefully, by hand. And be sure to dry them thoroughly immediately after washing. Rusty blades are gross.
  • Figure out where you’re going to store them safely. I use a knife block that sits on my counter top for mine and it has a convenient little slot for my shears…nice! There are also knife blocks that fit inside a kitchen drawer. Other chefs swear by using a magnetic strip. Make sure your knives are magnetic before you decide on this…many stainless steel knives and all ceramic ones will not stick to a magnet.

In order to eliminate ED from their lives, generic levitra uk medical science has invented a new kind of medicine that is called generic medicine. There viagra pills canada are many reasons why a man may not be able to get or keep an erection. In special schools, every child is given individual attention and the curriculum is also planned so as to focus on the influencing reason and some other contributing variables. buy generic cialis Since truly, additionally critical than aggregate sexual fulfillment? With Xanogen you have the ability to turn in to a more stable and strong to maintain an erection when having sex, you are almost certainly suffering from cialis online Performance Anxiety Erectile Dysfunction.
Remember that a knife is a very personal thing. That’s why I would steer clear of boxed sets of knives unless you can hold each one in your hand before you buy them.

Next time…tools for mixing!

Equipping Your Kitchen…Part 2: Bakeware

In Equipping Your Kitchen…Part 1, we discussed the kinds of pans you need to get a good start in your kitchen. Today, let’s talk about…

Bakeware

Everyone loves home-baked things…cookies, casseroles, meatloaf…and with the right kind of pans, you can make these things too! Most of the pans that are specifically meant to go in your oven have multiple uses. Here are the ones I consider necessary for everyone.

A sheet pan

sheet pan More precisely, everyone needs a half-sheet pan. (There is such a thing as a whole-sheet pan, but most home ovens aren’t large enough to accommodate them.) A half-sheet pan is 17-1/2” long by 12-1/2” wide with 1” tall sides. Your grandma may have called it a “jelly roll pan” and, yes, you could make a jelly roll in it if you felt like it. It’s possibly the most useful baking pan you will own. Here’s a short list of things I use mine for: cookies, a glorious concoction known as “Texas Sheet Cake”, a drip pan under my pies, baking Tater Tots & french fries, a serving tray, roasting bacon (yes, this is a thing…a very, very fine thing), etc. Mine are heavy-duty rolled aluminum. Heavier is definitely better; cheap ones warp when they get hot. Steer clear of ones with dark coatings. They usually just burn the bottoms of things before the tops get done. Expect to spend $10 to $15 on a good one.


An 8” or 9” square cake pan

square cake pan

It’s good for cake…and so much more. I make brownies, cornbread and lemon bars in mine…I’ve even roasted a small chicken in one. The difference between an 8×8 and a 9×9 is negligible for most uses. Make sure the one you get has sides at least 1-1/2” tall. There are lots of kinds to choose from. I have three of them…a 9” ceramic one (which I love), a 9” heavy aluminum one (which I love) and an 8” non-stick coated steel one (which I hate and hardly ever use). The reason I hate the non-stick one: it has a dark coating that invariably burns the bottom of whatever I’m baking, no matter how closely I watch it. A nice one will set you back about $10.


A loaf pan

20150704_224520Fess up…you may not want to admit it, but you love meatloaf! Not ready to let the world know yet? OK…will you confess to a special place in your heart for banana bread? It doesn’t matter what your favorite brick-shaped food is…if you want to make it, you’ll need a loaf pan. I have them in several sizes, but my favorite one is 8”x4” with 3” high sides. They come in several different materials…steel, aluminum, ceramic, even silicone. Oddly, all of mine (except a Corning Ware one I bought at Goodwill for $1) are made of Pyrex, a type of tempered, heat-resistant glass. This type of glass produces a really nice crust on loaves without burning them and is fairly easy to clean. A nice stout one, metal or glass, shouldn’t cost more than about $15.


A ceramic casserole dish

20150704_224702Grandma finally gave you the recipe for her famous tuna-noodle casserole that she bakes in that Corning Ware dish with the little blue flowers on it. You know you want to make that yummy thing that tastes like home. You just need something to bake it in! And that thing is a casserole dish. I have them in sizes that range from 1 quart to 5 quarts, with lids and without. But the most useful ones I have are 2 to 3 quarts. The prices range from $5 for a bargain basement one to over $100 for a foo-foo French one. A real Corning Ware one will probably cost $25 to $30. A Pyrex one is more like $10 to $15. (A word to the wise: Check your local Goodwill, junk store or garage sales. You can probably pick up a really nice one for way less than $5.)


A cooling rack

20150704_225004

A cooling rack is one of the biggest multi-taskers in your kitchen. It’s not just for cooling your freshly-baked cookies anymore! You can use it to drain fried foods, make beef jerky, as a big trivet if you’re taking several things out of the oven at the same time or that bacon roasting thing I mentioned earlier. Get one that’s roughly the same size as your sheet pan, 11”x16” or so. Mine are non-stick, stackable and have legs that fold underneath the rack for easier storage. You can get a package of 2 or 3 for less than $10.


Most of the baking I do uses these same pans over and over. But I also have a short list of bakeware items that are not strictly necessary, but really handy to have.

The extract is extremely bitter, it is said to be faced only by the men around the world have taken the bold decision to take this cute-n-tiny.com cialis from india. This condition is referred to in the medical community as Peyronie’s Disease, and is also sometimes called fibrous caverositis as a description of the condition of having fibrous scar tissue building up in the layers of erectile tissue (cavernosa). cialis purchase online http://cute-n-tiny.com/page/49/ Through time, Singapore has placed itself as one of the best drugs for the treatment of erectile viagra in canada dysfunction in men. Causes for Premature Ejaculation Are you dealing with Premature Ejaculation? Don’t worry because 20-30 percent of men http://cute-n-tiny.com/cute-animals/dog-and-deer-pals/ get viagra in canada are dealing with this sexual issue daily. A 13”x9” rectangular pan

bake-and-store-13x9-pan

They’re ubiquitous at potlucks and church suppers. Most of the recipes for desserts in the Junior League cookbook your Great Aunt Tilly gave you require one. Making brownies for a crowd?…13×9 pan. Big batch of broccoli-rice casserole?…13×9 pan. Cornbread dressing for the whole darn clan at Thanksgiving?…13×9 pan. I have 2; one’s ceramic and one’s heavy-duty aluminum and has a snug-fitting hard plastic lid. I use the pretty blue ceramic one when I’m trying to impress people. I use the aluminum one the rest of the time. As before, avoid ones with dark finishes. A nice, sturdy one is about $10.


A muffin tin

20150704_224841 If you like cupcakes, you’ll probably want a muffin tin. They come in 3 sizes; mini, regular and jumbo. If you decide to get one, I’d start with a regular one. These usually have 12 (or sometimes just 6) indentations that hold about ½ cup of batter each. If you feel the need to own a second one, go for a mini. Not just for those cute-as-a-button baby cupcakes, a mini muffin tin is also great for baking meatballs. Muffin and cupcakes cook pretty quickly, so these tins are just about the only baking pan where a dark finish is preferred. A muffin pan, regardless of muffin size, shouldn’t cost more than $10.


Two 9” round cake pans

IMG_0644

One round cake pan is not particularly helpful. They’re best in pairs. I primarily use mine for 2 things, layer cakes and flan. But when I make those things, nothing else will do. You can look like a genius baker by making a layer cake with a boxed cake mix and a can of frosting. And all you did was follow the package instructions! They should be of fairly heavy metal, either aluminum or steel and with a light-colored finish and have sides that are at least 1-1/2 inches high. They’re often sold in pairs and should cost anywhere from $10 to $15.


A pie pan

20150704_224738 Nothing’s homier than a freshly baked pie. And you need a pie pan to make a pie. The reason why pie pans are on the “not strictly necessary” list is because you can buy delicious pie crust already in a disposable aluminum pan all ready for you to use and claim as your own. There’s also fabulous ready-made pie crust dough already rolled out for you to put in your very own pie pan. They really put the “easy” in “easy as pie”. Pie pans come in a lot of sizes and materials. My favorite one is a 9” Pyrex one. One of those runs about $7.


There are a few disposable items that aren’t pans that will help you immensely when you’re baking. Here are my favorites: aluminum foil, parchment paper & paper cupcake liners.

Aluminum foil comes in several varieties and sizes. The two types I use most are heavy-duty and non-stick. Non-heavy-duty foil is like the tissue paper of metal and is nearly useless unless you double it up. I vastly prefer heavy-duty. It’s twice the thickness of regular and is much more resistant to tearing. I use it to line casserole dishes for easier clean up, covering pans without lids and wrapping ears of corn before I put them on the grill. Contrary to some urban legends, it doesn’t matter if you put the shiny or dull side next to the food. Non-stick foil means just that. It’s aluminum foil that NOTHING will stick to. Anytime you need to wrap something up and have it not stick, this is what you want. The non-stick coating is only available on the dull side of the foil.

Parchment paper is the paper equivalent of non-stick foil. I use it to line my sheet pans when I’m baking sticky things. When you’re done, you can throw away the mess and your pan remains clean.

Paper cupcake liners are little pleated cups that fit in your muffin pan and are extremely helpful in keeping the muffins or cupcakes from sticking to the pan. They allow you to get your precious cupcakes out of the pan intact and are available for every size of muffin.

There are literally hundreds of other baking items available for sale in the wide, wide world. I should know; I have loads of them. But these items should allow you to bake a myriad of recipes for years to come. Next time…sharp things!

Equipping Your Kitchen…Part 1: Pots & Pans

Before you leap into your kitchen to whip up a batch of your world-famous boeuf bourguignon, it’s important that you get your workspace ready to use with some basic equipment. Here are the tools I consider essential for every kitchen:

  • Pots and pans
  • Bakeware
  • Sharp things (knives, shears, cutting boards, graters)
  • Tools for mixing (wooden spoons, spatulas, whisks, bowls)
  • Tools for measuring (measuring cups, spoons, thermometers, timers)
  • Tools for cooking (tongs, colanders, steamers, hot pads)
  • Tools for serving (slotted spoons, ladles, entirely different kinds of spatulas)
  • A very select group of small appliances (that you get to select)
  • A fire extinguisher (fairly self-explanatory)

The powerful herbal ingredients of the oil boost the sensitivity of the receptors to it. tadalafil generic online Do not forget to consult your viagra from canada pharmacy doctor before starting up with any medicine. Restrictions in myofascia often manifest as joint restrictions viagra on line and pain. Once you ingest the jelly, you should take it with loads of water. india cheap cialis
Some you should splurge on, others you can get for very little. I’d like to take these categories one at a time and explain what’s necessary, what’s awesome but not crucial and what you probably don’t need at all. Let’s start with…

Pots & pans

First, the main difference between a pot and a pan are the handles; pots have two loopy ones and pans have one straight one. There are approximately one bazillion kinds of pots and pans and trying to decide what you really need is a bit overwhelming. There’s one for every conceivable thing you could possibly cook. 99.9% of them are not needed in a beginner’s kitchen. The trick is figuring out what 0.1% of them are right for you. Everyone’s personal needs will (and should) vary. That being said, here’s a short list of the ones I feel are necessary for everyone.

A cast-iron skillet

SONY DSCThere’s a reason why this was your grandma’s favorite pan. What a multi-tasker! You can fry chicken in it, bake cornbread in it, make pie in it or, if need be, whack intruders upside the head with it (this is not an endorsement for whacking anybody in the head, with a skillet or otherwise). Cast iron is dense and conducts heat extremely well. This means you can get it screaming hot and it’ll stay hot even if you put something large and cold (like a steak or a roast) in it. You can put them in the oven because blistering heat won’t hurt them a bit. They’re a bit of a pain to prepare for their first use (this is called “seasoning”), but if you care for it properly you might be able to hand it down to your grandchildren. 10 to 12 inches is a good size; anything smaller is not terribly useful and larger ones are just too heavy. A good one from Lodge will probably cost $20 to $25.


A non-stick skillet

20150628_181148You may be saying to yourself, “Why do I need two kinds of skillet?” (For the record, skillet and frying pan mean the same thing.) Good question! Cast-iron skillets are truly awesome for lots of things, but I don’t know that I would cook scrambled eggs in one. So it shouldn’t be surprising that these are sometimes called “omelet pans”. They generally have short sides that curve to meet the flat bottom. You’ll need to be careful with the utensils you use in them because metal ones can damage the nonstick surface. There have been a lot of advances in nonstick coatings in recent years, but it’s probably best if you don’t use really high heat with these pans. The main thing you’re looking for is solid construction and a surface as slick as a corrupt politician. Super cheap ones will warp if you get them too hot. High-dollar ones aren’t really worth the expense. I got my Calphalon Kitchen Essentials ones (an 8” one and a 10” one) at Target for about $35.


A saucepan with a lid

20150628_181230 These are extremely versatile pans; as good for cooking a batch of oatmeal or warming up cocoa as they are for slowly simmering a sauce. They’re round with tallish sides. Get them with good lids. You’ll need it, even if you’re just using the pan to make Stove Top stuffing. I have two nonstick aluminum ones, a 1-1/2 quart one and a 2-1/2 quart one. Nonstick aluminum is awesome and cleans up easily even if you scorch something. Nice ones will set you back about $30 or $35 each.


A stockpot with a lid

20150628_181312 You’ll need a stock pot if you ever plan to boil pasta for any reason whatsoever. It should be a bare minimum of 4 or 5 quarts in capacity although MUCH larger ones exist (the largest one that I use with much frequency is 16 quarts). These are also awesome for large batches of chili or soup, braising a stew, or (if you’re feeling sassy!) making your own stock. They come in stainless steel, aluminum and nonstick variations and I don’t have a real preference toward any one version. Just be sure it comes with a lid. Price points vary wildly. I’ve seen them starting as low as $10 and can head up to the stratosphere. My advice while shopping for one is to pick them up, imagine taking them across your kitchen heavily laden with boiling water, then spend accordingly. I’d plan to plunk down at least $40.


You could happily get through most everyday cooking tasks with this list with no problem. I also have a short list of pans that are not strictly necessary, but really handy to have.

A Dutch oven

Which one is the foo-foo French one? I’ll never tell!

A Dutch oven is a heavy, round or oval pot that’s wider than it is tall and has a tight-fitting lid. They’re designed to be useful on the stove top, in the oven or even over the campfire. In fact, they’re the pot you probably think of when you imagine what settlers cooked in. Frankly, you could do all your cooking in one. They’re almost always made of cast iron, so they’re excellent for a myriad of tasks: deep-frying, searing, simmering and braising. The most useful size is about 5 quarts, although I have a 3 quart one that’s pretty awesome for small households. Prices for that size can range from $35 for a perfectly serviceable plain cast iron one to $300+ for a fancy French enamel-coated one. If I were buying one today, I’d aim for something in the $50 range.


A wok

carbonsteelwokYour decision to get a wok will depend entirely on how much you want to make Asian food at home. If you’re at all serious about it, you’ll want one. It’s a cone-shaped pan (still called a pan even though they have two handles) designed to be used over very high heat and concentrate that heat at the bottom while the sides stay relatively cool. Don’t buy a wok unless you can see hammer marks or subtle concentric rings going up the sides. Those are used for holding food pulled up from the bottom and sort of storing it on the sides while something else cooks in the high heat in the bottom. The good ones are at least 14” in diameter, made of carbon steel and have a ring to hold the pan steady. If you can, buy your wok in an Asian market. You can get a decent one for less than $30.

A griddle

20150628_183658

A griddle is essentially a skillet with no sides. They’re excellent for cooking flat things that won’t produce much splatter as you cook them, like pancakes, sausage patties or grilled cheese. Strictly speaking, you can cook all those things in a skillet but I find the skillet’s sides get in the way when you’re trying to turn them over to cook the other side. Most griddles are square and I’d get one that’s nonstick. It should be at least large enough to fit 4 pieces of French toast at a time. You should be able to get a perfectly serviceable one for $20.


A grill pan

I know many of you live in apartments or don’t have a place to put a grill. This doesn’t mean you can’t have grilled food! You just have to have a grill pan. Most are square, made of cast iron and have raised bumps across the bottom of the pan to simulate a grill. And I have to admit they do a pretty admirable job of giving you the look and taste of grilled food, sans the actual grill. These run about $20.


(A word of warning: The pans I use every day are wonderful; nonstick, hard anodized aluminum that conducts heat well and cooks evenly. Anodizing is the process where the aluminum pans are treated with electrically-charged sulfuric acid to make them 30% harder than stainless steel and non-reactive with acidic foods the way other kinds of aluminum can be. They have a beautiful matte-black finish and are incredibly durable. That same process has one mildly unpleasant side effect; you can’t wash the pans in the dishwasher. Even thinking about putting them in the dishwasher discolors the finish and starts wearing down that amazingly smooth cooking surface. If you don’t mind hand-washing your pans, hard anodized ones are an excellent choice. If you can’t stand the idea of not being able to wash your pans in the dishwasher, steer clear of hard anodized aluminum ones. There are lots of other choices and I’m sure you’ll find pans you’ll love.)


So there’s the list. As I said earlier, there are a bazillion other kinds of pans; from wee little butter warmers to big oblong salmon steamers to ginormous multi-gallon seafood-boiling pots. As you become more comfortable in the kitchen, you may want to add a few to your pan inventory. But these should get you going as you start on your own personal culinary adventure. Next time: bakeware!

Hey, Newbie Cooks!

Today is the start of The Newbie Cook! I hope you’re as excited as I am! Cooking and feeding others what I’ve made is my very favorite thing to do and I hope I can help you love it too.

If you watch too much of the Food Network (I know I do!), cooking can seem like something that can only be accomplished by highly-trained chefs with culinary degrees using fancy equipment and with the very freshest ingredients. Let me be very, very clear about this: THIS IS A MYTH!  Anyone can make tasty food and you don’t have to have years of experience or a kitchen full of expensive appliances, gadgets and ingredients.

In fact, I’m going to spill a few secrets right now that you can use to make things easier in the kitchen.

Not everything has to be “fresh”! Here are a few of my favorite non-strictly-fresh ingredients:

  • Frozen vegetables – Nothing beats vegetables fresh from the farm in the summer. They’re inexpensive, fabulously delicious and, by all means, eat heartily when they’re in season. But when they go out of season, the prices rise and they don’t taste as good as they did just a few short weeks earlier. Enter frozen veggies! They’re generally of excellent quality and prices remain constant all year round. Heck, they even go on incredible sales from time to time, so, if freezer space allows, stock up when those babies go on sale for 79¢ a bag!
  • Dried herbs – Similar deal with herbs, except they’re pricey even in the summer! Dried herbs last about a year before they start to lose flavor, so write the date of purchase on the bottom of the bottle with a marker.
  • Dried onions – One of my very favorite pantry ingredients is dried minced onions. A tablespoon of those can dress up a batch of mac and cheese, scalloped potatoes or green beans. I use them for two reasons: they taste pretty good and I really, really hate chopping onions. I’ve never had any go bad, but I use them at a pretty good clip.
  • Minced garlic in a jar – Whatever I said about chopping onions goes double for mincing garlic. You get to use fresh-tasting garlic in your dish and your hands won’t smell – win/win!
  • Canned fruit (especially pineapple) and dried fruit (emphasis on cranberries, apricots & mangoes) – A world of wonderful things can be made with canned or dried fruit and a few pantry staples…more on those in a future post.

It increases the level of testosterone in body and enrich the cells to absorb nutrition, reducing the impact of aging on tissues, for its viagra sample canada growth. After waking up in the morning, you will need to follow the detailed steps in order to get the erection can use viagra cialis levitra Silagra to get the solid, strong, and long-lasting erection. Often there is such a pre-occupation with the other person’s drinking or addiction Get More Information discount pfizer viagra and a project to reform or change them. The risk of ED cost of viagra 100mg increase with the age.
There is nothing wrong with the store brand! A lot of the store brand items you see at your local supermarket were processed and packaged in the same facilities as the name brand ones. I’ll admit I have brand loyalty for a few select things (Skippy peanut butter, Heinz ketchup), but for the most part the store brands taste just the same as the name brands. Try a few out and decide for yourself.

Prepackaged foods can be your friends! Lots of them are very tasty and pretty cost effective. Here are a few I use all the time:

  • Stuffing mix – This is one of my pantry staples. Dress it up with a small can of mushrooms, a palmful of dried onions and a palmful of dried cranberries and use chicken broth (and the juice from the can of mushrooms, be sure to measure it) instead of water. Try not to spend more than a dollar a box on these. (The usually go on a HUGE sale right after Thanksgiving and essentially last forever on the shelf.)
  • Boxed macaroni and cheese – Everyone loves mac and cheese; anyone who says otherwise is not to be trusted. It can also be the base of about a thousand other dishes.
  • Flavored rice and noodle packs – Same thing as mac and cheese, but with more flavors. They also be used make some pretty tasty “homemade” soup…really. Don’t spend more than a dollar a pack on these.
  • Rotisserie chicken – The single biggest bang for your buck in the supermarket is a rotisserie chicken. I’m not kidding. You can’t buy and roast a chicken yourself for what they charge for a rotisserie chicken. If you have access to a warehouse store membership (Sam’s Club, Costco, etc.), buy a couple of them there. The chickens are huge and less than $5. Eat some tonight and save the rest for use in something else tomorrow.
  • Canned spaghetti sauce – The second biggest bargain in the store is canned spaghetti sauce. I can think of 10 different ways to use it without even trying. It’ll probably be on the bottom shelf of the Italian foods aisle and is generally a buck a can.

Not all your pans, kitchen appliances & gadgets need to be new! I have many wonderful items in my kitchen that I inherited from relatives, bought at garage sales or junk stores. I also inherited a lot of crap. The trick is being able to tell the difference. I can help you with that.

Not all your new stuff needs to come from a pricey kitchen store! In fact, exactly precisely NONE of it needs to come from a foo-foo store. There are a few things you should probably splurge on and other things you don’t need to spend much on, but you can buy remarkably well-made things in the most unlikely of places. The next time your Great Aunt Tilly drags you to TJ Maxx for heaven-knows-what, stroll past the kitchen gadget aisle…you may be surprised at what you find.

So there you go. I’m excited and I hope you are, too. If I can help just one of you gain more confidence in the kitchen and maybe even fall in love with cooking, I will have succeeded. Let’s start this journey!