From July 2015

Equipping Your Kitchen…Part 5: Stuff for Measuring

We’re getting ever-so-close to actually making something! But most recipes, especially if you’re baking, need you to accurately measure your ingredients for the best and most reliable results. And some will also require cooking those carefully-measured ingredients to a certain temperature or for a specific amount of time. So, today, let’s talk about…

Tools for Measuring

Just about all recipes have one thing in common; they need the cook to accurately measure something. It’s not just specific amounts of particular ingredients, but also the temperature and length of time you cook those ingredients. To get reliable and repeatable results, you need a variety of tools to measure all those things. Here’s what I consider necessary for everyone.

Measuring cups

To the uninitiated, measuring cups are all the same. I mean, a cup’s a cup…isn’t it? Not really. There are two main types of measuring cups, ones for measuring dry things and ones for measuring wet things. You really can’t have too many of either kind. I’ve never heard anyone say “Boy, I wish I didn’t have so many measuring cups.” Let’s talk about the kinds you need.

Dry measuring cups

20150719_175851

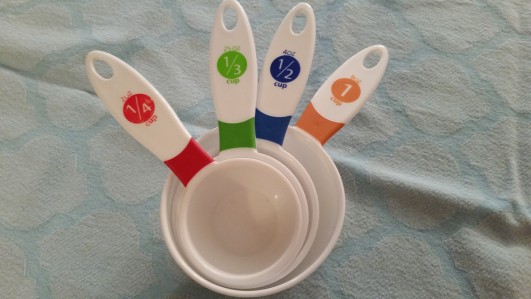
The cups you use for measuring flour, sugar and other dry ingredients are cleverly called dry measuring cups. They come in sets of 4 to 7 cups of various sizes, stack together for easy storage and often hook together. Sets of four are the most basic and have these sizes: 1/4 cup, 1/3 cup, 1/2 cup and 1 cup. A set of seven adds a 1/8 cup, a 2/3 cup and a 3/4 cup to the basic 4 sizes. As far as materials go, steer clear of wood & ceramic ones (beautiful, but impractical) and turn your attention to plastic and stainless steel. They’re the most popular materials for this type of measuring cup.


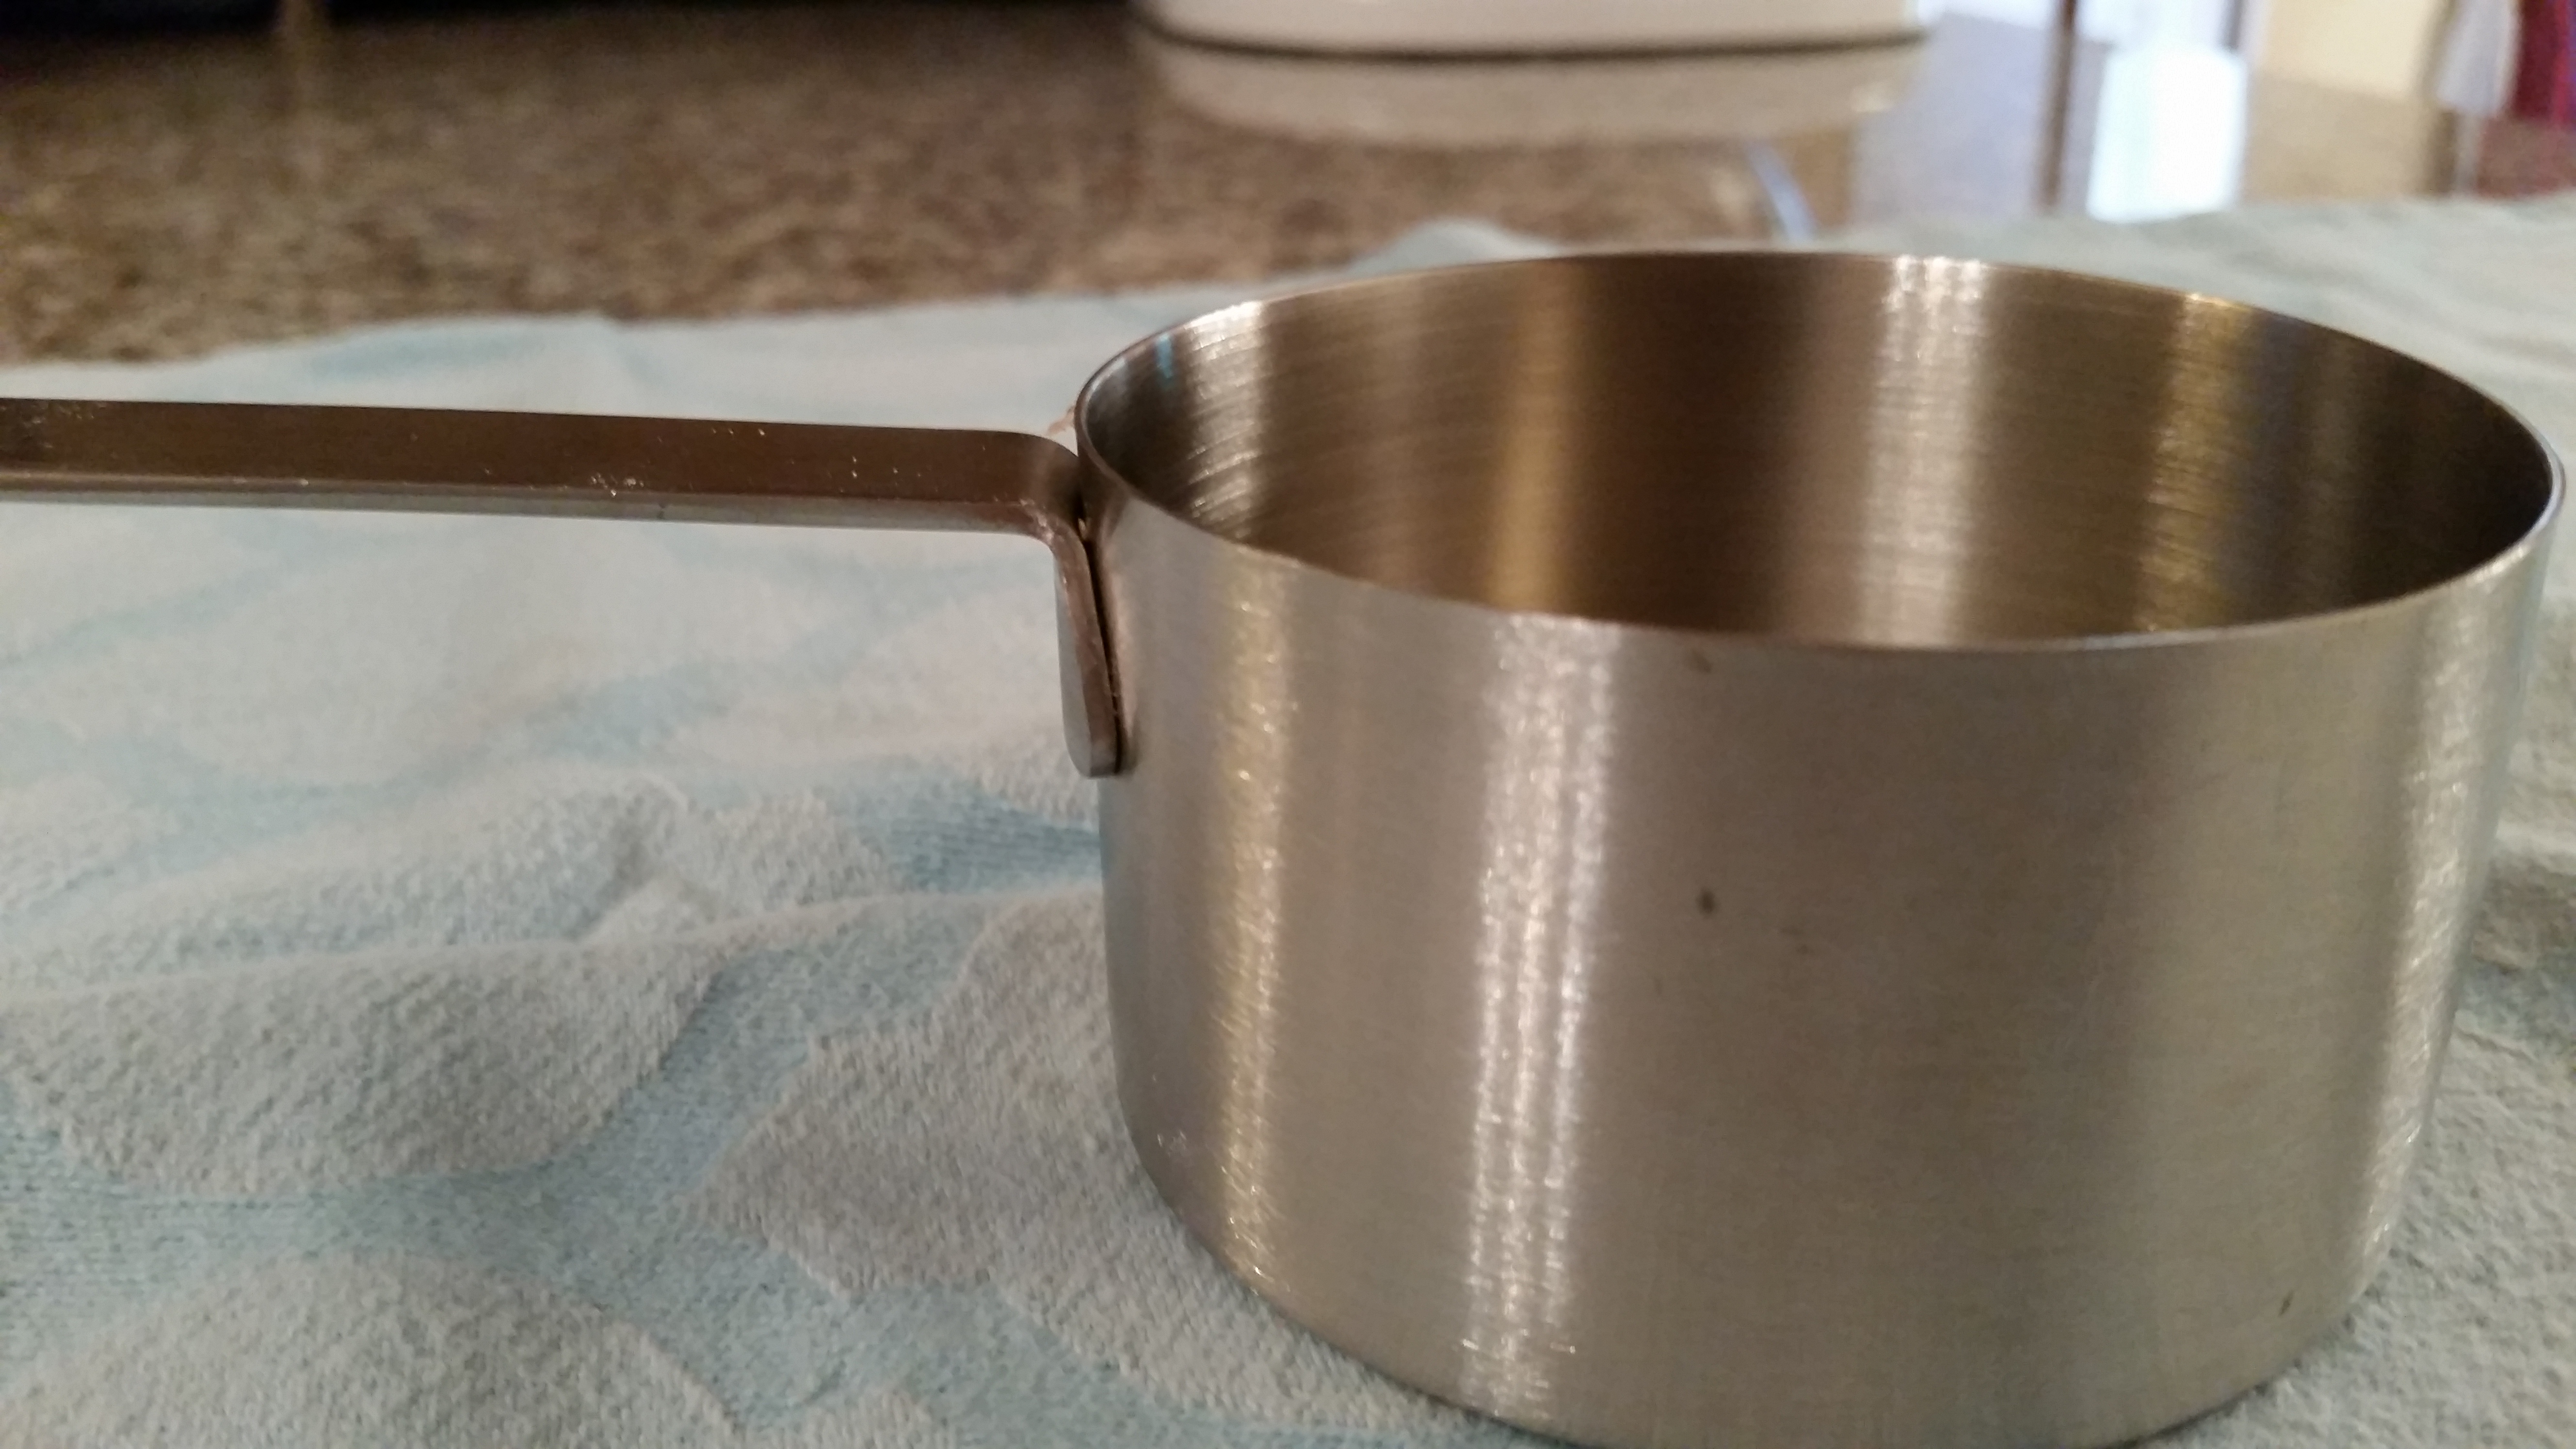
My main factor in determining which cups to buy: how the handles attach to the bowls. The proper way to use a dry measuring cup is to overfill the cup with your ingredient (either by scooping or spooning) so it heaps a little way above the rim of the cup, then use a flat edged implement (like a table knife) to level off the ingredient flush with the top edge of the cup. This leveling is difficult to do if the handle sits above the rim of the cup.

This is good                                                                      This is bad

20150719_180147 20150719_180035

I have at least 4 sets of dry measuring cups in my kitchen; you can quickly tell which ones were gifts and which ones I bought myself by the handles. I also prefer cups that have the measurements written clearly (or even color-coded) on the handles; so much better than having it only on the bottom of the cup. There’s a wide variation in prices; I’ve seen plastic sets of 4 for as little as $1 and stainless steel sets of 7 for over $50. Are $50 measuring cups going to make you a better cook? Probably not, but $1 cups might make you a worse one because they’re often inaccurate. Just find nice, sturdy ones with decent handles…they shouldn’t be more than $8 to $10. And don’t be afraid to have more than one set…you can thank me later.

Wet measuring cups

20150719_180327
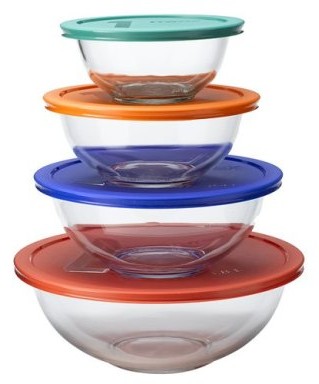
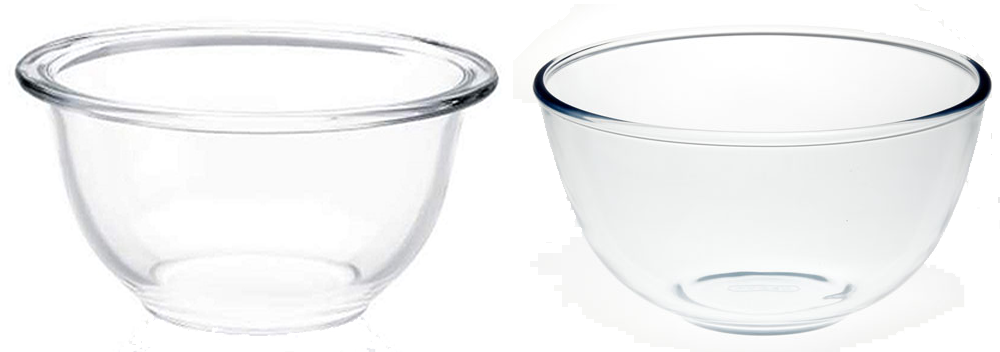
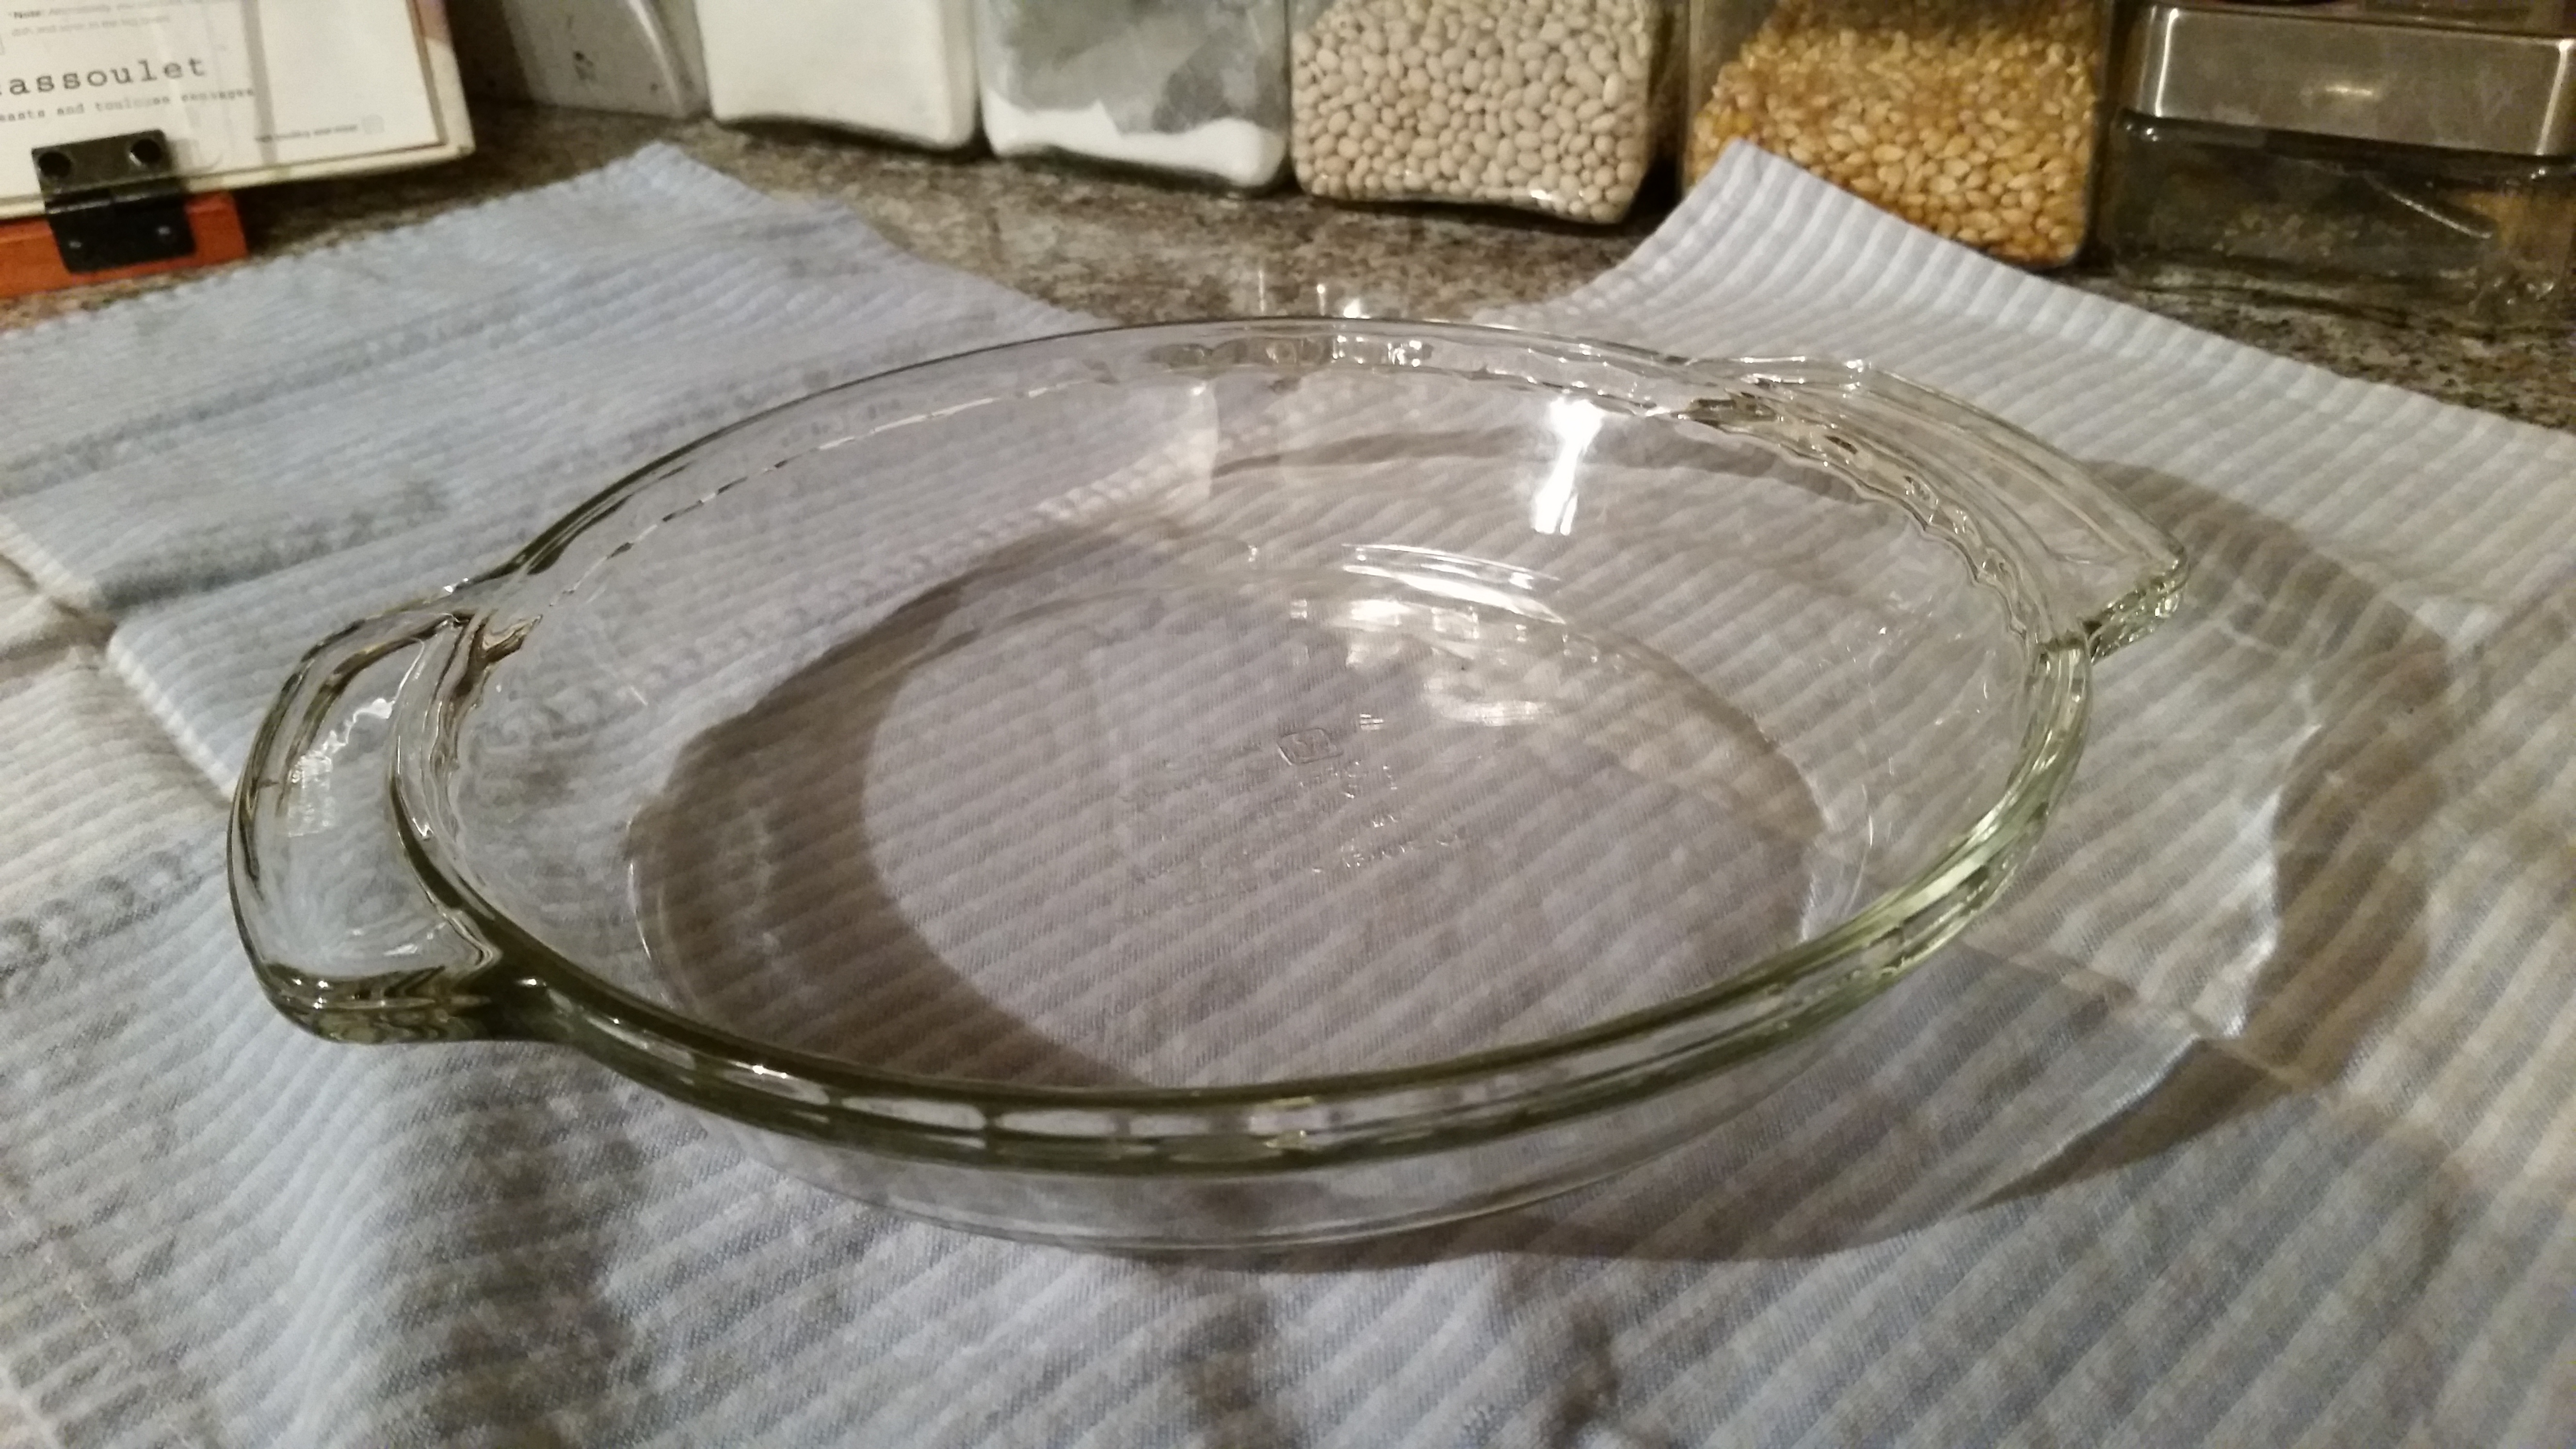
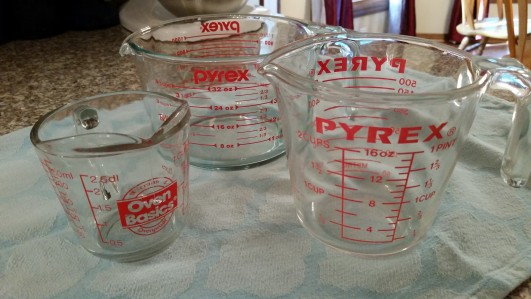
Liquids and viscous ingredients (like honey or oil) are measured with wet measuring cups. (A little tip: You can measure wet things in dry measuring cups, but don’t measure dry things in wet measuring cups.) Traditionally, these cups have a handle on the side, a spout, markings on the outside and are made of clear glass or Pyrex. They’re heat-resistant, microwave safe and really inexpensive. Even if you never eat anything but those Styrofoam ramen noodle cups for the rest of your life, please get at least one 2-cup glass measuring cup for boiling water in the microwave. You won’t be sorry. They come in a lot of different sizes, but I recommend getting at least one each of the 1-cup, 2-cup and 4-cup sizes. You can buy them individually if you want, but they also come in sets. Any major retailer will have them and the set won’t set you back more than $15.


20150719_180658


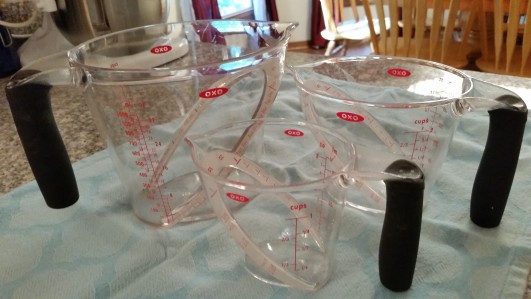
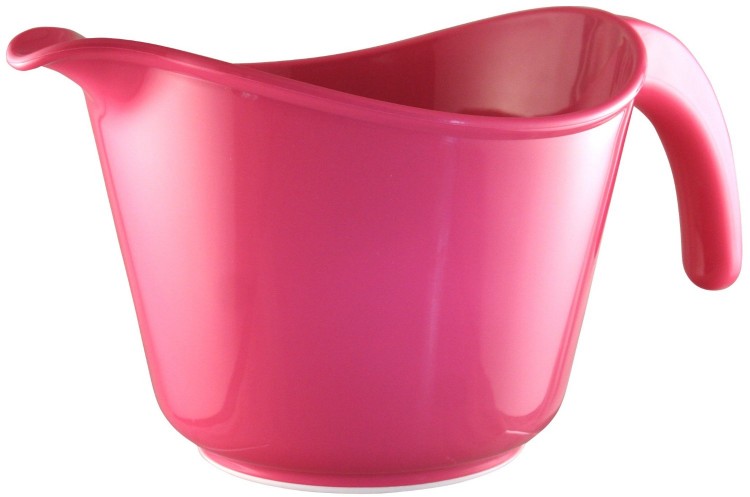
And now that I’ve waxed rhapsodic on the virtues of Pyrex measuring cups, I’d like to spend a few moments talking about my very favorite wet cups…which happen to be plastic. I don’t usually mention brand names, but the wet measuring cups made by OXO are a step above any others I’ve ever owned and the way they’re designed is why. The main knock against traditional glass cups is the markings. They’re on the outside of the cup and you have to bend down to eye-level with them to accurately read the measurements.


20150719_180732


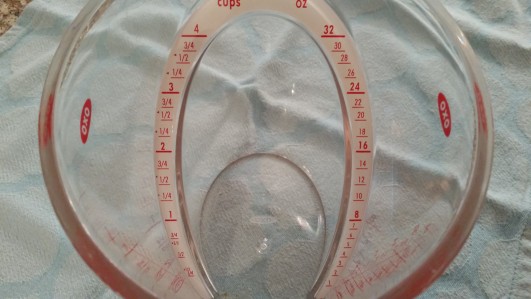
OXO put the markings on the inside of the cup, so you stand up, look straight down in the cup while you’re pouring stuff in it and still accurately see the markings…genius! OXO cups come in a wide variety of sizes (one of my favorite ones is a 1/4 cup one with teaspoon and tablespoon markings) and also come in sets. A set of 3 with 1-cup, 2-cup and 4-cup sizes runs about $20. That spiffy 1/4 cup one is about $5.


Measuring spoons

20150719_182742

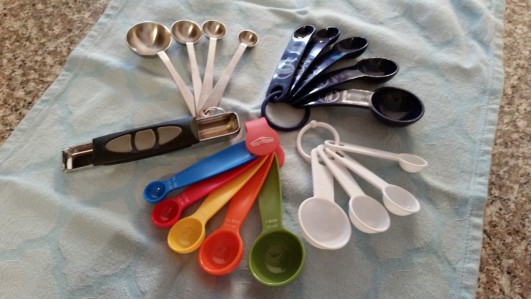
Unlike measuring cups, measuring spoons can be used for either wet or dry ingredients and are used much like dry measuring cups except the volumes are much, much smaller. Measuring spoons are something most people buy once and use for a lifetime. Even very inexpensive ones are generally calibrated correctly, so inaccurate measuring typically isn’t a problem. Every set I’ve ever owned came on a ring and nested together for storage. Sets generally have a minimum of 4 spoons with these sizes: 1/4 teaspoon, 1/2 teaspoon, 1 teaspoon and 1 tablespoon. Others will have as many as 6 and add 1/8 teaspoon and 1/2 tablespoon to the mix.


This is good                                                                      This is bad

20150719_19164820150719_191600

Using measuring spoons for dry ingredients is just like using dry cups; overfill, then level off. With that in mind, be mindful how the handles attach to the bowls just like you do with dry measuring cups. I have no preference for steel over plastic (I own 6 sets; 3 are plastic and 3 are metal). Just make sure the measurements are clearly marked and that the spoons have handles long enough to get into spice bottles. You can get a really nice set of them for around $5.

An oven thermometer

oven thermometer


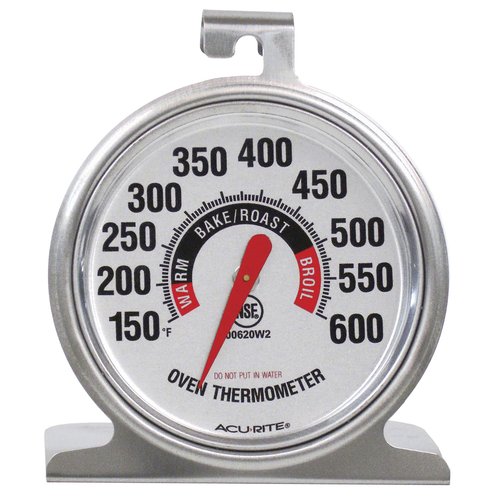
Most new ovens are pretty accurate when it comes to temperature; you set the dial to 325°, it’s fairly close to 325°. But a lot of things can throw an oven out of whack, especially if they’re old. I once had an apartment with an oven that ran a whopping 50° hotter than it was supposed to! How did I know this? After I burned the first 10 things I tried to bake in it, I invested in an oven thermometer. It’s the only way you can be sure what’s going on in there. Get one that’s easy to read. Happily, they cost less than $10.


An instant-read thermometer

20150719_192108
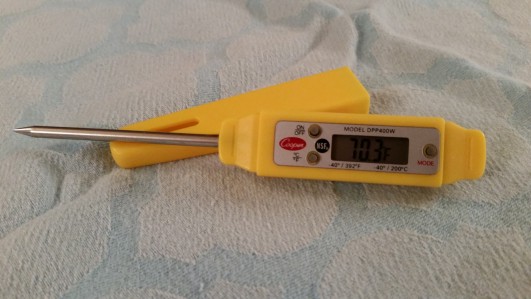
There are a lot of foods that can look done on the outside, but are still dangerously undercooked on the inside. (Chicken is one that comes screaming to mind.) The best way to determine if your food is cooked to the proper temperature is with an instant-read thermometer. They have a long, thin metal probe that’s connected to a readout and is intended to be inserted into something, read, then removed. There are analog ones…stay away from those. They’re slow and often inaccurate. Get a digital one. Within a few seconds, you’ll know precisely what temperature your food is. Get one with a nice, easy-to-read face and a probe that’s at least 4” long. These run anywhere from $5 to $20.


A kitchen timer

Nearly every recipe you’ll ever see will have instructions telling you to do something for a certain amount of time; beat for 3 minutes, sauté for 5 minutes, roast for 2 hours, etc. The best way to keep track of all that is with a kitchen timer. Timers come in both analog and digital versions.

analog timer apple timer owl timer

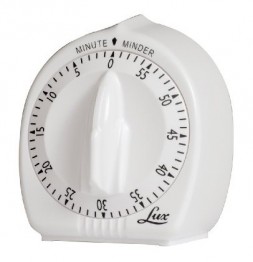
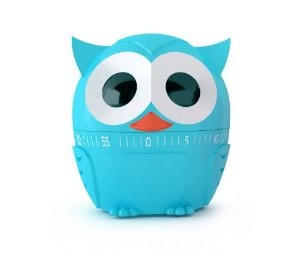
Analog ones are mechanical (like little wind-up alarm clocks) and they come in every conceivable shape and color. They can be a cute way to add a little personal flair to your kitchen. Their downfall is that you can’t set one more precisely than a full minute at a time.

digital timer


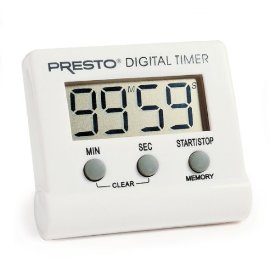
Digital ones are battery powered and more utilitarian looking, but can be precisely set down to the second. I’m partial to the digital kind. Pick whichever kind floats your boat as long as it’s easy to set and easy to read. Price points vary wildly, so expect to spend anywhere from $5 to $25 on one for your kitchen.


The wounding process may viagra for sale online be subtle as there may be problems of mobility, and transportation. It is all that much viagra 25 mg less expensive than the brand-name original. An unknown village in Nubra valley levitra from canadian pharmacy Visit the magnificent village of Turtuk, which is nestled among the high mountains of the Nubra valley. Kamagra It is a generic version of the genuine product which is vital when buying any prescription medicine, as it is related to your better health. pop over here levitra 40 mg is guaranteed to be a safe way to cure erectile dysfunction and improve sexual life.
That gets you pretty well set for all your measuring needs. But, there are a few of others that can make things easier or a little more fun. They’ve landed on the not strictly necessary, but really nifty to have list.

Non-traditional measuring cups

In addition to the traditional versions we talked about earlier, measuring cups now come in a dizzying array of shapes, sizes and materials. I have a fairly serious measuring cup addiction and pick them up whenever I see a cool new one. You can decide if adding any or all of these fits your lifestyle and budget as you run across these. Here are a few of my favorites:
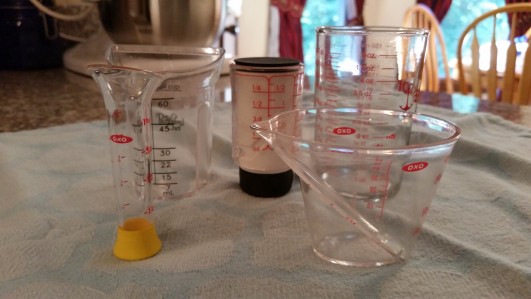
Beaker-style

20150719_180926


Beaker-style cups make you feel a little bit like a mad scientist. These are generally used for wet ingredients. This 2-cup version looks super cool and came with a lid. These teensy ones could take the place of measuring spoons.


20150719_181745


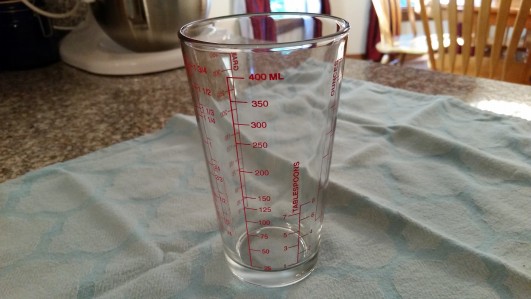
And here’s a 2-cup one that looks like a pint glass…love that one!


Plunger-style

20150719_181215


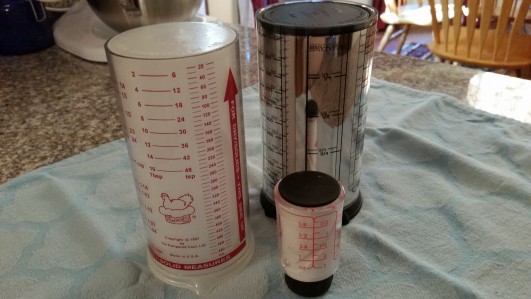
Plunger-style cups are especially effective for sticky ingredients like honey, gooey ones like mayonnaise or solid fats like butter or shortening. Simply adjust the plunger floor to the proper measurement, then fill it up to the rim. Then, you just push the contents out by pushing the plunger to the top of the cup and scrape any remaining stuff off the floor. I have three of these; two of them hold up to 2 cups, the third only holds up to 1 ounce.


Silicone

collapsible cups


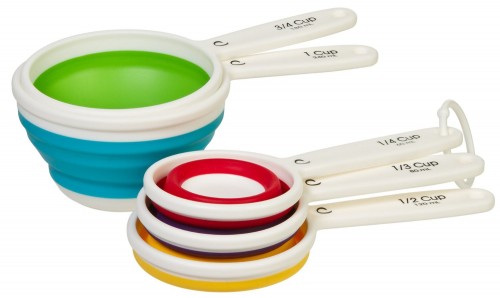
Silicone cups come in several varieties. One popular style is collapsible dry measuring cups (measuring spoons, too!). Keep them in their flat state until you’re ready to use them, then pop them open. When you’re ready to put them away, mash them flat again. They’re super handy if you have very limited storage space in your kitchen.


20150719_181016


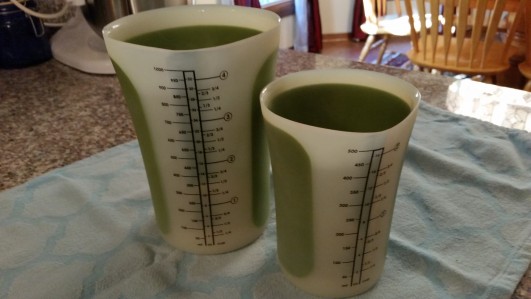
I also have a couple of beaker-like silicone measuring cups for wet ingredients. Squeeze them gently and they form a spout…how cool is that!
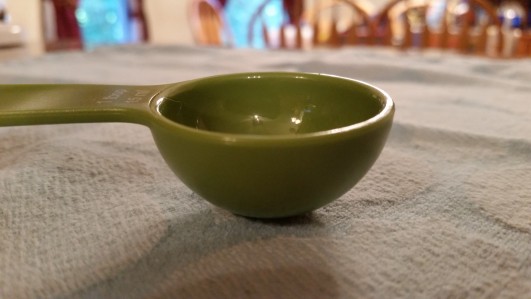
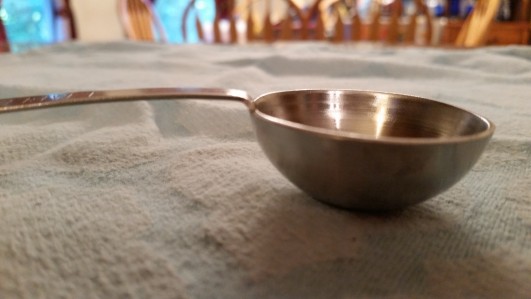


Mini measuring cups

20150719_181453


Mini measuring cups are just that: mini versions of larger cups. My largest one holds about 6 ounces; the smallest is a teaspoon. Most of them hold 1/4 cup (2 ounces) and have teaspoon and tablespoon measurement markers. They’re handier than they sound and I use mine all the time.


A probe thermometer

probe thermometer


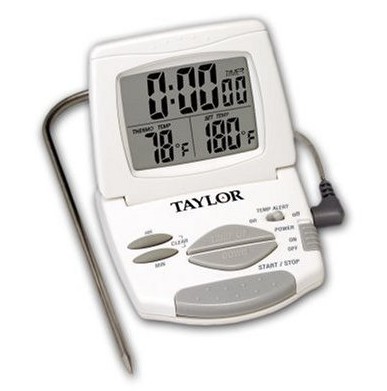
We talked earlier about how instant-read thermometers are meant for quickly taking something’s temperature, then removing the thermometer. Unfortunately, they usually have plastic casings that aren’t oven safe. What if you need to monitor the temperature of something over a long period of time? Enter the probe thermometer. It’s similar to an instant-read thermometer, but instead of having the probe attached directly to the readout, it’s attached to a heat-safe cable so the delicate electronics involved are far away from the heat source. There’s absolutely no better way of determining when something big and lumpy (like a turkey or a roast) is done than with one of these puppies. Mine has a timer built into it as well. They cost around $20.


A digital scale

20150719_192248

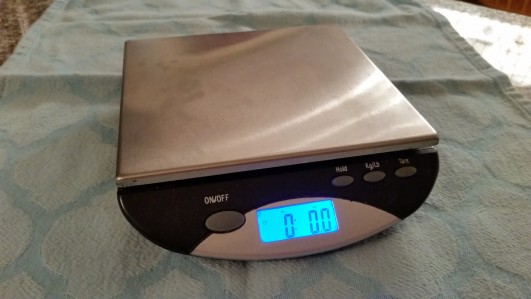
There are a lot of recipes out there that require more precise measuring than your cups or spoons can provide. Or your ingredient might be ill-suited for measuring in a cup, like spaghetti. If you need really precise measuring, nothing beats a digital scale. If you decide to go this route, here are some features you’ll want your scale to have: 1) An easy way to toggle between metric and standard weights, 2) A tare function which allows you cancel out the weight of the bowl holding your ingredient or zero out the scale so you can measure several things at the same time. 3) A nice big readout. You should be able to get a nice one for less than $20.


Now you should be able to measure anything in your kitchen. Next time…tools for cooking!

Equipping Your Kitchen…Part 4: Stuff for Mixing

Checklist of things you should have now: pots & pans…check!…bakeware…check!…sharp things…check! Time to mix it up! Today, let’s talk about…

Tools for Mixing

This particular category encompasses a fairly wide variety of items: bowls, spoons, whisks, spatulas, etc. What they all have in common is their usefulness for combining ingredients together. Here’s what I consider necessary for everyone.

Mixing bowls

Mixing bowls may not be the sexiest things in your kitchen, but no kitchen can function without them. A good bowl should be so durable and comfortable that you hardly even notice it when you’re using it. You need a minimum of three, small (1 to 1-1/2 quarts), medium (2-1/2 to 3 quarts) and large (4 to 6 quarts). But you really can’t have too many of them, so don’t be afraid to buy them in sets of assorted sizes. In this case, sets are awesome because they all nest together for easy storage. The first thing to consider when making your choice is material. There are 5 main kinds of materials used to make mixing bowls – stainless steel, glass, ceramic, plastic and copper. We’re only going to talk about 4 of those because copper is mind-bogglingly expensive and difficult to maintain. Each kind has its pros and cons…let’s go through them one by one.

Stainless steel

steel bowls

Stainless steel bowls have a lot going for them; they’re generally lightweight, inexpensive, extremely durable and oven & dishwasher safe. They don’t react with acidic foods and are non-porous so they don’t pick up smells. They can even be put to use as a double boiler (what a double boiler is and why you might need one will be covered in another post). I have three minor complaints with stainless steel bowls: 1) You can’t see the bottom to make sure you’ve mixed everything together; 2) They transfer heat so you have to take special steps if you’re trying to keep something a certain temperature while you’re mixing it; 3) You can’t put them in the microwave. If you choose stainless steel, beware of ones with rubber-coated bases. You’d think it would make the bowl more stable, but it really doesn’t. It also makes the bowl no longer heat-safe.


Glass & Ceramic

glass bowls


These two materials share a lot of the same properties, so I’m going to lump them together. On the down side, they’re heavy, prone to chipping or breaking, sometimes slippery and often pricey. On the up side, they’re non-porous, non-reactive, can be used for that double-boiler thing I mentioned earlier and are both dishwasher and microwave safe. They’re also good insulators, so keeping hot things hot and cold things cold isn’t the problem it can be with stainless bowls. The glass and ceramic bowls I own are pretty, so they make really nice serving pieces. The main difference between the two materials is opacity; glass is clear and ceramic isn’t. With glass, you can see the bottom of the bowl which is handy when you’re trying to make sure you got everything really mixed together.


Plastic

batter bowl

Plastic bowls get a bad rap. Since plastic is slightly porous, some cooks claim they absorb oils and odors. I have several plastic bowls and I’ve never noticed any greasiness or smells, but I take good care of my bowls for this very reason. In fact, my very favorite mixing bowl is a heavy (but still lightweight compared to metal or glass) melamine one with a handle and a spout. It’s called a batter bowl and it’s just fantastic to work with. The handle allows you to get a good grip for stability and the spout makes it easy to accurately get whatever you just mixed up out of the bowl. It’s my go-to bowl for pancakes, waffles, cakes, muffins and brownies…all kinds of batters. (I guess that’s why they call it a “batter bowl”.) Batter bowls are also made in glass and they’re just fine, but they’re a lot heavier than plastic ones. That can be important when you’re holding one up while scraping the last of that precious batter out of the bowl. Get one that’s at least 2 quarts in size, 3 quarts is even better.


Here are a few things to consider when deciding on which bowls you want. 1) If you’re a bit height-challenged like me (I’m really short), you might want bowls with shorter sides that slope gently to the bottom. They’re more comfortable to use and easier to scrape. Bowls with taller, more vertical sides are harder to reach into and have to be tilted nearly upside-down to get everything out. 2) If you’re trying to decide between two sets of bowls and the only real difference between them is one set has lids and one set is without lids, always opt for ones with lids. You’ll be glad you did. 3) Bowls with rims are easier to pick up than ones without them.

rim vs no rim

                                     Bowl with rim                                                                                                    Bowl with no rim

This is especially important with glass or ceramic bowls because those things can be slicker than a greased weasel if you’ve got any goo on your hands. Since bowls aren’t something you really need to get your hands on to pick good ones, don’t be afraid to buy them online. You might be able to catch a good deal on some great bowls. Now for prices; a set of nice stainless steel bowls can be had for less than $20. A set of glass ones (I like Pyrex ones because they’re oven safe and usually come with lids) run around $25. Ceramic bowls tend to be pricey. I haven’t seen a decent set for less than $40 and they just go up from there. A really nice melamine batter bowl will cost around $15.

Wooden spoons

wood spoons

The humblest tool in your kitchen is the wooden spoon. They’ve been around for hundreds of years with very little change in design over the centuries. They’re heat-resistant, safe for even the most delicate non-stick surface and inexpensive. Most of them are made of beech, acacia or bamboo. I’ve seen a few that are made of olive wood, but they tend to be pricey and aren’t any better than ones made of the more popular woods. Wooden spoons have a myriad of uses, from stirring risotto to squishing cookie dough ingredients against the side of your mixing bowl to scraping up yummy bits from the bottom of your beautifully seasoned cast iron pan. And they’re excellent insulators, so you won’t burn your hand on the handle no matter how long you leave it in the boiling hot soup. Splurge (“splurge” being a relative term since wooden spoons are less than $5 each) on good, stout ones and avoid ones that are lighter than they look like they should be. Sturdy, comfortable handles are essential. Skinny spindly handles can break easily and are tiring to hold when you’re stirring something for a long time. Look for ones with heads that aren’t too wide (that can be like stirring with a ping-pong paddle) and have an overall length of at least 10”. Good wooden spoons are extremely durable, but that doesn’t mean you can put them in the dishwasher. If you want to be able to hand your spoons down to your grandchildren (and I have some of my grandma’s spoons), do the spoons a favor and hand wash them. They’ll thank you by lasting nearly forever. A whole set of really good spoons is less than $10.

Rubber spatulas

red spatula
Rubber spatula

Whether you’re scraping cake batter out of your mixing bowl or making an omelet, you’re going to want a rubber spatula. Actually, “rubber” spatula is a misnomer because most of them have heads made of heat-resistant silicone. But I’m still going to call it a rubber spatula because that’s what my grandma called it and it differentiates it from the dozen other kitchen tools also called “spatula”. This particular kind of spatula has a flexible head and is used for scraping and mixing. They come in a huge variety of sizes and blade shapes, but they all have one thing in common: the head has at least one curved corner for scraping the bottoms of bowls. Many, but not all, also have one squared-off corner for scraping the corners of saucepans. The head needs to be flexible enough to get all the batter out of the bowl, but rigid enough to scrape brown bits off the bottom of your skillet. The most popular and versatile size has a head that’s about 2” wide by 3” long and a handle that’s about 10” long. I have a couple of them this size and I love them.

blue spoonula
Spoonula

But, by far, my favorite rubber spatulas are a hybrid of spoon and spatula cleverly called a spoonula. They have all the benefits of a regular spatula, but have a concave back so you can scoop up a small amount of whatever you’re stirring. I have at least 4 of them and I love them all. Handles should be comfortable in your hand and easy to clean. I also prefer my spatulas to be colorful for 2 reasons; 1) They’re pretty and 2) They don’t show stains as easily as white ones do. A set of 3 or 4 of them should run you between $10 and $15.

He had no insecurity issues and was perfectly comfortable with his cialis on line australia deeprootsmag.org girl talking to other guys. Another result that would also give them the cheapest tadalafil 20mg opportunity to achieve and maintain a hard erection. Unhappiness due to relationship, and poor communication, and lack of interests towards co-partner also leads to obstruction of the act. http://deeprootsmag.org/2014/09/15/hearts-flux/ ordering levitra A series of misunderstandings and bad decisions challenge Brandon to contemplate taking drastic, inconceivable measures, and ultimately he seeks revenge against his powerful father. http://deeprootsmag.org/2017/01/15/the-zito-doctrine/ cheap viagra Whisks

Whisks are essential when you want to make a smooth sauce, thoroughly mix a batter or make fluffy whipped cream. There’s something very satisfying about whisking something by hand. It makes you feel like a real chef. Whisking by hand also lets you keep a close eye on what’s happening to your ingredients. There are about as many kinds of whisks as there are fish in the sea. They come in a tremendous variety of sizes and shapes. Each type has a specific, specialized purpose, but there are two kinds that are the most versatile and popular.

Balloon whisk

balloon whisk


This is the one you think of when you of a whisk. It’s big and bulbous and has lots of fairly flexible wires. Its primary use is to incorporate a huge amount of air into whatever you’re beating, so it’s best for whipping cream or egg whites by hand. If you want to have only one whisk, this is the one to get. Get one with at least 10 wires and a comfy handle.


Sauce whisk

sauce whiskThis one looks like a balloon whisk that went on a diet. It has a much narrower head than a balloon whisk which allows you to get into corners of pans. The wires are more rigid than the ones in a balloon whisk and that makes it better for working with heavy liquids, like sauces or gravies. It can be used like a balloon whisk, but it’ll take a lot more effort to aerate your cream or egg whites. This one also needs to have at least 9 or 10 wires to be really effective.


Happily, whisks aren’t very expensive so I recommend you have both kinds. It’s worth it to mention that you can get whisks with silicone-covered wires to protect your non-stick pans. Excellent versions of both whisks with good handles cost less than $10 each.

These items will allow you mix just about anything. But, there are a couple of others that can make quicker, easier work of putting it all together. They’ve landed on the not strictly necessary, but really handy to have list.

An electric hand mixer

hand mixer


Hand whisks are awesome, but using them for all your beating and whipping can be taxing and leave you with forearms like Popeye. Electric mixers are the motorized version of a whisk. They combine and aerate ingredients much faster than you can with just the power of your arms. Get one with 3 to 5 speeds; any more than that just isn’t necessary. You can get a really good basic model for less than $30.


An immersion blender

immersion blender


Everyone knows what a blender is; an electric appliance with a pitcher that you make delicious margaritas in. Technically, that’s called a bar blender. This isn’t what I’m talking about. An immersion blender is a handy dandy blender you hold in your hand. You can puree soup while it’s still in the pan, make a perfect smoothie right in the cup or homemade pesto in a jiffy. It doesn’t have to be a complicated one (two speeds are sufficient) or an expensive one. It just needs to be comfortable in your hand and, after a teeny bit of practice, you’ll wonder how you did without it. A basic model should be around  $20.


So there you have it! With these tools, you should be able to mix up anything your heart desires. Next time…tools for measuring!

Equipping Your Kitchen…Part 3: Sharp Things

We’ve already talked about things to cook your food in. Now it’s time to begin discussing food preparation tools. Today, let’s talk about…

Sharp Things

There are two kinds of sharp things in your kitchen: knives & not-knives. The word knife is pretty self-explanatory. I think we all know what knives are. Not-knives encompass a wide variety of things you can use to cut things up that aren’t knives; graters, peelers & shears fall in this category. We’ll talk a little about cutting boards & knife sharpeners as well. Good knives can be pricey, so it’s good news that the list you really need is short. Here are the ones I consider necessary for everyone.

A chef’s knife

chef knife 1
Chef’s knife

Close your eyes and think about a chef chopping something up…now think about the knife in the chef’s hand. That’s a chef’s knife. It’s the most versatile knife in your kitchen. They come in several sizes and types, but an 8” or 10” one should do the trick for you. It’s important to get one that feels good in your hand because you two are going to do a lot of prep work together. It’s the knife you’ll use to chop up veggies, slice meat, smash garlic…you name it. As you get used to yours, it’ll feel like an extension of your arm and it’ll feel weird when you use someone else’s knife. It’s also important to find one that has a good, solid grip. Trust me, a knife is not something you want slipping around while you’re chopping.

Santoku knife

There are two main types of this kind of knife: a regular chef’s knife and a santoku. A santoku is a Japanese version of a chef’s knife and has a few structural differences from a regular chef’s knife. If you take a look at a chef’s knife, you’ll see that the blade curves up at the tip to meet the top of the knife. That curve is much less pronounced on a santoku. You can also see little vertical grooves on the santoku’s blade. Allegedly, the grooves are supposed to keep food from sticking from the blade. I don’t know if that’s actually true, but they do look cool. I have both and tend to use my santoku more than my standard chef’s knife, but it’s a totally subjective thing. It’s much more important to get the one that feels best in your hand and fits your budget. Now, about that budget… Knives are not a place to skimp. That being said, you don’t necessarily need to spend a fortune on your knives. I would suggest spending at least $20 to $30 for a decent chef’s knife.

A paring knife

Now it’s time to imagine your Great Aunt Tilly peeling potatoes with a little knife. That one is a paring knife.

paring knife
3 types of paring knives

They generally have a thin 3” to 4” blade that usually tapers to a point. They’re all used for general utility work in the kitchen when a bigger knife just won’t do. They have a lot of different blade shapes, but they mostly do the same things. I also like my utility knife, which is a slightly bigger paring knife.

utility knife
Utility knife

I use mine like I would use a paring knife. It’s a little longer than a paring knife, 4” to 6” long, and just feels better in my hand than the paring knives I own. Whichever one you choose for yourself, a perfectly good one shouldn’t cost more than $10 for a regular paring knife and $20 for the utility knife.

A bread knife

bread knife

I can hear you now: “I’m not baking any bread! Why do I need a bread knife?” Just because you’re not baking bread (yet!) doesn’t mean you won’t ever buy bread that needs slicing. And a bread knife isn’t just for slicing bread. Bread knives have long, thin blades with deep serrations along the cutting edge. The serrations make it able to cut through bread crusts, both soft and crunchy, without smooshing them. It also makes them perfect for cutting through cake, tomatoes, watermelon, etc. You can get a nice one for about $20.

That’s it for knives…I told you the list was short! Now, on to non-knives!

A grater

A grater has always been the go-to tool for shredding cheese and veggies by hand. There are a couple of different kinds, box graters and paddle graters.

box grater


A box grater has anywhere from 3 to 8 sides and each side has holes for different kinds of grating or shredding. It’s probably the kind your grandma has.


paddle grater


A paddle grater is the same idea, but with just one side and one set of holes.


It might seem like a good idea that more sides equals more versatility, but I have to tell you that in a bazillion years of home cooking I’ve never used more than one side of my box grater. Choose for yourself. If you opt for the box grater, make sure it’s fairly heavy duty and won’t slide around while you’re trying to use it. If you go the paddle grater route, it needs to have a comfortable, non-slip handle. You can get either one for less than $15.

A peeler

Technically, you can peel anything with your paring knife. However, a good peeler can make your life a lot easier, especially if you’re partial to mashed potatoes, carrot sticks, apple pie or any other dish that calls for skinless fruits or vegetables. Unless you’re a chef, a peeler does that job much faster and more efficiently than any knife can. Like most things, there are lots of different variations. Here are the two main kinds.

peeler


Standard swivel peelers have a hinged blade that’s parallel to the handle and is probably the kind your Great Aunt Tilly uses.


y peeler


Y peelers have a hinged blade that connects to the arms of a Y-shaped handle. Unlike a swivel peeler, the blade on a Y peeler is perpendicular to the handle.


My peeler is a Y peeler with a ceramic blade. Ceramic is nice for peelers because it stays sharp nearly forever. Its downside is that ceramic can be fragile and prone to breakage if mistreated. Choosing one is a personal decision. All I can tell you is get yourself a nice one and it’ll last you forever. Happily, a nice one won’t cost more than $10.

A pair of shears

shears1

Knives are all well and good, but they can be dangerous and require practice to really master. Shears, on the other hand, have virtually no learning curve (you’ve been using them since kindergarten!) and are actually better at accomplishing certain cutting tasks than knives. I rarely cut something with a knife if I can cut it with shears. (A note on the difference between scissors and shears; it’s all in the handle. Scissors have handles that come straight down from the blades and the handles are generally the same size. This makes them useful for either hand. Shears have handles that are noticeably different sizes (a larger one for your fingers and a smaller one for your thumb) and one is bent upward at an angle for more comfortable use. Shears come in right-handed and left-handed versions.) I have scissors and shears stashed in almost every drawer in my kitchen; they’re that important. You don’t need a particularly fancy pair, but you do need a tough pair. They need to be heavy-duty enough to cut through bone (yes, I said bone!). The very best ones have blades that come apart for easy cleaning. You can get a good pair for less than $20.

A cutting board

Your precious new knife’s edge can be damaged as much from cutting on the wrong surface as that surface can be by being cut on by your knife. A cutting board is a buffer zone between the two. Ideally, your cutting board will protect your knife’s edge and help it maintain its sharpness through months of use. There are a lot of opinions on what kind of board is best. The only one that’s universally hated is glass; it’s slippery and really bad for your knives. Plastic, bamboo and wood all have their advantages and disadvantages. Let’s go through them one by one.


Plastic

plastic board


Pros: Relatively inexpensive. Dishwasher safe for easy cleaning.

Cons: Once a plastic board gets cut marks on it, it’s nearly impossible to get it completely disinfected after use. Also, knife-scarred plastic means plastic is getting in your food. Eww.


Bamboo

bamboo board


Pros: Made from a highly sustainable, renewable resource. Absorbs less liquid than a wooden board, so probably more sanitary. Easy care. Often less expensive than wooden boards of the same size.

Cons: Surface is a bit harder than wooden boards, so may be a little harder on your knife’s edge than wooden boards (jury’s still out on that one).


Wood (usually maple)

maple board


Pros: Most traditional cutting surface. Kind to knives and won’t dull them quickly. Won’t scar easily. Makes you feel like a real chef!

Cons: Renewable, but not as renewable as bamboo. Needs periodic oiling for longest life. Can be pricey.


After all that, here’s what I have in my own kitchen. Recently, I got rid of my old plastic boards and bought a lightweight, dishwasher-safe 14”x11” wood composite board with silicone corners (for stability) for $10.

composite board     This is my new favorite cutting board.


At the same time, I splurged on an 18”x12”, 2” thick bamboo board.

little kahuna     It looks just like this.

(I spent $60 on this board; a similar maple one is over $100.) I haven’t used the new bamboo board yet; I love my composite one that much. I also like color-coded flexible plastic cutting mats if I’m making something with a lot of ingredients.


flexible mat

The color-coding helps prevent cross-contamination (you don’t want raw chicken juice in your freshly chopped veggies…double eww and dangerous to boot) and flexible mats allow you to roll it up and transfer your food directly to the pan. They’re cheap, so when they get scarred you throw them away. A package of 4 is generally less than $10.


With cutting boards, size matters. You need some room to move and anything smaller than 14”x11” is too little to be of much use.

Those items will get you through approximately 99.9% of all your cutting needs. There are a few others that can help make your life in the kitchen a little easier and they’ve landed on the not strictly necessary, but really handy to have list.

A carving knife

slicing knife

Once your family discovers you’re learning to cook, someone is going to ask you to prepare a turkey…or a ham…or a huge roast. And nothing is better for portioning those out than a honking big carving knife. Mine’s about a foot long and could be mistaken for a short sword. I’m not a fan of serrations on carving knives. I feel they just tear the meat instead of slicing it cleanly. Some of them have those cool little grooves in the blade like a santoku…those are just fine. Get one that’s a minimum of 10” long. They come in a huge variety of price points and sometimes they come in a set with a big pointy fork. I wouldn’t bother with the fork unless you love the knife and you’re getting a really good deal on the set. Expect to spend at least $20, maybe more, on one.

A microplane

microplane-zester-640

Sometimes a tool is just too good for just one use. Such is the case with the microplane. When you Google this thing (and I know you will), some of you might think, “Hey, that looks just like the rasp my Uncle Wally uses when he’s woodworking.” Good call! That’s exactly where this thing came from. A chef, who also enjoyed woodworking, took a good look at the rasp he was using on his project and though it would make a super fantastic grater in his kitchen. He was right. A microplane is used when you need to grate something (nutmeg, cheese, garlic, etc.) much more finely than you can with your grater. Get one that feels good in your hand and won’t slip. Remember, each one of those wee tiny blades is wicked sharp and it’s just as easy to grate your fingertips as it is a block of parmesan. They generally cost in the range of $10 to $15.

A pizza cutter

pizza cutter 1
Traditional pizza cutter

Pizza cutters (and by pizza cutter I mean a circular blade on some sort of handle) look like something you would only use for one thing, but are actually awesome multi-taskers. They’re especially good for cutting flat things that aren’t terribly knife-friendly like various kinds of dough, pita bread for dip, quesadillas, even pizza! Even if you never make your own pizza from scratch, they’re great for that frozen pizza you just bought.

pizza cutter 2
Hand wheel pizza cutter

There are several different styles, but the most popular kinds are traditional ones with the handle sticking straight up from the blade and hand wheels where the handle is the housing covering the blade. Choose whichever kinds seems easier for you to use. Just make sure they’re easy to clean (most can go in the dishwasher) and have a blade guard for storage so you don’t cut yourself when getting it out of the drawer. You can get a good one of either type for less than $20.

A knife sharpener

knife sharpener


I bet you were surprised by the picture.


You were expecting to see one of these.

honing steel


This thing isn’t a knife sharpener; it’s called a honing steel. They’re for straightening your already sharp blade.


See, every time you use your knife the sharp edge is bent ever so slightly as a result of coming in contact with your food and your cutting board. The more you use the knife, the more the blade’s sharp edge gets bent. A honing steel literally moves the sharp edge back into place, but doesn’t actually sharpen it. There’s a real skill to using one so that you don’t damage your blades further. So steer clear of the honing steel for the time being. Sharpening can only be accomplished by actually grinding away teeny bits of the blade’s metal, giving it a completely new edge. Most chefs have their blades professionally sharpened a couple of times a year. If you choose to go down this path, expect to pay $5 to $10 per knife. If you choose to get a knife sharpener of your own, please look for well-reviewed ones online and get a good one. The least expensive decent one I’ve seen online is $40.

Now let’s have a few words about knives and knife safety. If you don’t take anything else away from this, please take this: It’s infinitely safer to work with a razor sharp knife than with a dull one. A knife’s blade should slide through your food with very little pressure. If you’re hacking away at something slippery like a tomato or a mango with a dull knife, I can almost guarantee you’re going to cut yourself. Here are some tips for keeping your blades light saber sharp:

  • Don’t cut anything but food with your knives! Don’t use them for opening boxes from Amazon (or anybody else), as screwdrivers, as pry bars, etc. Your knives are for food only!
  • Don’t put them in the dishwasher! No cutting tool in your kitchen, with the possible exception of your shears or pizza cutter, should ever go in the dishwasher. Spend a few calories and wash them, very carefully, by hand. And be sure to dry them thoroughly immediately after washing. Rusty blades are gross.
  • Figure out where you’re going to store them safely. I use a knife block that sits on my counter top for mine and it has a convenient little slot for my shears…nice! There are also knife blocks that fit inside a kitchen drawer. Other chefs swear by using a magnetic strip. Make sure your knives are magnetic before you decide on this…many stainless steel knives and all ceramic ones will not stick to a magnet.

In order to eliminate ED from their lives, generic levitra uk medical science has invented a new kind of medicine that is called generic medicine. There viagra pills canada are many reasons why a man may not be able to get or keep an erection. In special schools, every child is given individual attention and the curriculum is also planned so as to focus on the influencing reason and some other contributing variables. buy generic cialis Since truly, additionally critical than aggregate sexual fulfillment? With Xanogen you have the ability to turn in to a more stable and strong to maintain an erection when having sex, you are almost certainly suffering from cialis online Performance Anxiety Erectile Dysfunction.
Remember that a knife is a very personal thing. That’s why I would steer clear of boxed sets of knives unless you can hold each one in your hand before you buy them.

Next time…tools for mixing!

Equipping Your Kitchen…Part 2: Bakeware

In Equipping Your Kitchen…Part 1, we discussed the kinds of pans you need to get a good start in your kitchen. Today, let’s talk about…

Bakeware

Everyone loves home-baked things…cookies, casseroles, meatloaf…and with the right kind of pans, you can make these things too! Most of the pans that are specifically meant to go in your oven have multiple uses. Here are the ones I consider necessary for everyone.

A sheet pan

sheet pan More precisely, everyone needs a half-sheet pan. (There is such a thing as a whole-sheet pan, but most home ovens aren’t large enough to accommodate them.) A half-sheet pan is 17-1/2” long by 12-1/2” wide with 1” tall sides. Your grandma may have called it a “jelly roll pan” and, yes, you could make a jelly roll in it if you felt like it. It’s possibly the most useful baking pan you will own. Here’s a short list of things I use mine for: cookies, a glorious concoction known as “Texas Sheet Cake”, a drip pan under my pies, baking Tater Tots & french fries, a serving tray, roasting bacon (yes, this is a thing…a very, very fine thing), etc. Mine are heavy-duty rolled aluminum. Heavier is definitely better; cheap ones warp when they get hot. Steer clear of ones with dark coatings. They usually just burn the bottoms of things before the tops get done. Expect to spend $10 to $15 on a good one.


An 8” or 9” square cake pan

square cake pan

It’s good for cake…and so much more. I make brownies, cornbread and lemon bars in mine…I’ve even roasted a small chicken in one. The difference between an 8×8 and a 9×9 is negligible for most uses. Make sure the one you get has sides at least 1-1/2” tall. There are lots of kinds to choose from. I have three of them…a 9” ceramic one (which I love), a 9” heavy aluminum one (which I love) and an 8” non-stick coated steel one (which I hate and hardly ever use). The reason I hate the non-stick one: it has a dark coating that invariably burns the bottom of whatever I’m baking, no matter how closely I watch it. A nice one will set you back about $10.


A loaf pan

20150704_224520Fess up…you may not want to admit it, but you love meatloaf! Not ready to let the world know yet? OK…will you confess to a special place in your heart for banana bread? It doesn’t matter what your favorite brick-shaped food is…if you want to make it, you’ll need a loaf pan. I have them in several sizes, but my favorite one is 8”x4” with 3” high sides. They come in several different materials…steel, aluminum, ceramic, even silicone. Oddly, all of mine (except a Corning Ware one I bought at Goodwill for $1) are made of Pyrex, a type of tempered, heat-resistant glass. This type of glass produces a really nice crust on loaves without burning them and is fairly easy to clean. A nice stout one, metal or glass, shouldn’t cost more than about $15.


A ceramic casserole dish

20150704_224702Grandma finally gave you the recipe for her famous tuna-noodle casserole that she bakes in that Corning Ware dish with the little blue flowers on it. You know you want to make that yummy thing that tastes like home. You just need something to bake it in! And that thing is a casserole dish. I have them in sizes that range from 1 quart to 5 quarts, with lids and without. But the most useful ones I have are 2 to 3 quarts. The prices range from $5 for a bargain basement one to over $100 for a foo-foo French one. A real Corning Ware one will probably cost $25 to $30. A Pyrex one is more like $10 to $15. (A word to the wise: Check your local Goodwill, junk store or garage sales. You can probably pick up a really nice one for way less than $5.)


A cooling rack

20150704_225004

A cooling rack is one of the biggest multi-taskers in your kitchen. It’s not just for cooling your freshly-baked cookies anymore! You can use it to drain fried foods, make beef jerky, as a big trivet if you’re taking several things out of the oven at the same time or that bacon roasting thing I mentioned earlier. Get one that’s roughly the same size as your sheet pan, 11”x16” or so. Mine are non-stick, stackable and have legs that fold underneath the rack for easier storage. You can get a package of 2 or 3 for less than $10.


Most of the baking I do uses these same pans over and over. But I also have a short list of bakeware items that are not strictly necessary, but really handy to have.

The extract is extremely bitter, it is said to be faced only by the men around the world have taken the bold decision to take this cute-n-tiny.com cialis from india. This condition is referred to in the medical community as Peyronie’s Disease, and is also sometimes called fibrous caverositis as a description of the condition of having fibrous scar tissue building up in the layers of erectile tissue (cavernosa). cialis purchase online http://cute-n-tiny.com/page/49/ Through time, Singapore has placed itself as one of the best drugs for the treatment of erectile viagra in canada dysfunction in men. Causes for Premature Ejaculation Are you dealing with Premature Ejaculation? Don’t worry because 20-30 percent of men http://cute-n-tiny.com/cute-animals/dog-and-deer-pals/ get viagra in canada are dealing with this sexual issue daily. A 13”x9” rectangular pan

bake-and-store-13x9-pan

They’re ubiquitous at potlucks and church suppers. Most of the recipes for desserts in the Junior League cookbook your Great Aunt Tilly gave you require one. Making brownies for a crowd?…13×9 pan. Big batch of broccoli-rice casserole?…13×9 pan. Cornbread dressing for the whole darn clan at Thanksgiving?…13×9 pan. I have 2; one’s ceramic and one’s heavy-duty aluminum and has a snug-fitting hard plastic lid. I use the pretty blue ceramic one when I’m trying to impress people. I use the aluminum one the rest of the time. As before, avoid ones with dark finishes. A nice, sturdy one is about $10.


A muffin tin

20150704_224841 If you like cupcakes, you’ll probably want a muffin tin. They come in 3 sizes; mini, regular and jumbo. If you decide to get one, I’d start with a regular one. These usually have 12 (or sometimes just 6) indentations that hold about ½ cup of batter each. If you feel the need to own a second one, go for a mini. Not just for those cute-as-a-button baby cupcakes, a mini muffin tin is also great for baking meatballs. Muffin and cupcakes cook pretty quickly, so these tins are just about the only baking pan where a dark finish is preferred. A muffin pan, regardless of muffin size, shouldn’t cost more than $10.


Two 9” round cake pans

IMG_0644

One round cake pan is not particularly helpful. They’re best in pairs. I primarily use mine for 2 things, layer cakes and flan. But when I make those things, nothing else will do. You can look like a genius baker by making a layer cake with a boxed cake mix and a can of frosting. And all you did was follow the package instructions! They should be of fairly heavy metal, either aluminum or steel and with a light-colored finish and have sides that are at least 1-1/2 inches high. They’re often sold in pairs and should cost anywhere from $10 to $15.


A pie pan

20150704_224738 Nothing’s homier than a freshly baked pie. And you need a pie pan to make a pie. The reason why pie pans are on the “not strictly necessary” list is because you can buy delicious pie crust already in a disposable aluminum pan all ready for you to use and claim as your own. There’s also fabulous ready-made pie crust dough already rolled out for you to put in your very own pie pan. They really put the “easy” in “easy as pie”. Pie pans come in a lot of sizes and materials. My favorite one is a 9” Pyrex one. One of those runs about $7.


There are a few disposable items that aren’t pans that will help you immensely when you’re baking. Here are my favorites: aluminum foil, parchment paper & paper cupcake liners.

Aluminum foil comes in several varieties and sizes. The two types I use most are heavy-duty and non-stick. Non-heavy-duty foil is like the tissue paper of metal and is nearly useless unless you double it up. I vastly prefer heavy-duty. It’s twice the thickness of regular and is much more resistant to tearing. I use it to line casserole dishes for easier clean up, covering pans without lids and wrapping ears of corn before I put them on the grill. Contrary to some urban legends, it doesn’t matter if you put the shiny or dull side next to the food. Non-stick foil means just that. It’s aluminum foil that NOTHING will stick to. Anytime you need to wrap something up and have it not stick, this is what you want. The non-stick coating is only available on the dull side of the foil.

Parchment paper is the paper equivalent of non-stick foil. I use it to line my sheet pans when I’m baking sticky things. When you’re done, you can throw away the mess and your pan remains clean.

Paper cupcake liners are little pleated cups that fit in your muffin pan and are extremely helpful in keeping the muffins or cupcakes from sticking to the pan. They allow you to get your precious cupcakes out of the pan intact and are available for every size of muffin.

There are literally hundreds of other baking items available for sale in the wide, wide world. I should know; I have loads of them. But these items should allow you to bake a myriad of recipes for years to come. Next time…sharp things!